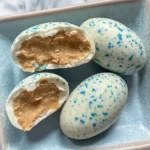
Peanut Butter Easter Eggs
If you’re looking for a fun and delicious treat to celebrate the spring season, these Peanut Butter Easter Eggs are just the ticket! They remind me of those classic candies we all know and love but with a homemade twist that makes them extra special. These delightful little eggs are perfect for family gatherings, Easter celebrations, or simply to satisfy your sweet tooth on a busy weeknight.
The best part? You only need a handful of simple ingredients to whip up these beauties. Plus, they’re a hit with kids and adults alike! So grab your aprons and let’s get started on making some unforgettable Peanut Butter Easter Eggs!
Why You’ll Love This Recipe
- Quick and Easy: This recipe is straightforward, making it perfect for those who want a sweet treat without spending hours in the kitchen.
- Family-Friendly Fun: Shaping these peanut butter eggs is a great activity to do with kids, adding an element of joy to your cooking experience.
- Customizable Colors: Use natural dyes to create beautiful pastel shades for Easter or any occasion—let your creativity shine!
- Make Ahead: These treats can be made ahead of time, allowing you to enjoy stress-free celebrations.
- Delicious Flavor: The combination of creamy peanut butter and sweet white chocolate is simply irresistible!
Ingredients You’ll Need
Let’s gather our ingredients! This recipe calls for simple, wholesome items that you might already have in your pantry. It’s amazing how just a few ingredients can come together to create such a delightful treat!
For the Peanut Butter Filling:
- 1 1/4 cup natural, runny peanut butter (no sugar added)
- 1/4 cup maple syrup
- 1/4 cup powdered sugar
- 1/3 cup almond flour
- 1/2 teaspoon vanilla extract
- Pinch of salt
For the Coating:
- 8 ounces white chocolate melting wafers (we use Ghirardelli brand)
- 2 teaspoons coconut oil
- 1/2 teaspoon blue spirulina + 1/4 teaspoon matcha powder (or use a 2:1 ratio of any blue and green food dye)
For the Speckles:
- 1 teaspoon cocoa powder + 1 tablespoon water
Variations
One of the wonderful things about this recipe is its flexibility! Feel free to mix things up and personalize your Peanut Butter Easter Eggs with these fun variations:
- Change the Nut Butter: Swap out peanut butter for almond or cashew butter for a different flavor profile.
- Add Crunch: Mix in some chopped nuts or crispy rice cereal into the filling for added texture.
- Try Dark Chocolate: If you prefer dark chocolate over white, feel free to substitute it in for an indulgent twist!
- Flavor Infusion: Add a dash of cinnamon or nutmeg to the filling for a warm spice note that complements the sweetness.
How to Make Peanut Butter Easter Eggs
Step 1: Make the Peanut Butter Filling
In a mixing bowl, beat together the peanut butter, maple syrup, powdered sugar, almond flour, vanilla extract, and salt until everything is well combined. This filling is what makes these Peanut Butter Easter Eggs so delectable! The mixture should be smooth and slightly sticky—perfect for shaping.
Step 2: Shape the Filling
Portion out the peanut butter mixture into 2-tablespoon portions. Roll each portion into a ball using your hands, then gently shape each ball into an oval (egg-shaped). This is where you can have some fun! Don’t worry if they’re not perfect; each egg will have its own unique character.
Step 3: Freeze the Eggs
Place your shaped eggs onto a parchment paper-lined baking sheet. Pop them in the freezer while you prepare the coating. Freezing them helps maintain their shape when you dip them in chocolate later—it’s an important step!
Step 4: Prepare the Coating
In a small bowl, whisk together cocoa powder and water; set aside. Then add white chocolate melting wafers and coconut oil to a microwave-safe bowl. Microwave in 15-20 second intervals, stirring well between each interval until fully melted. Whisk in blue spirulina and matcha powder (or food coloring) until you achieve your desired shade—this part is so much fun!
Step 5: Coat Each Egg
Coating works best when the eggs are semi-frozen. It ensures that the white chocolate sets quickly without pooling underneath! Insert a toothpick into each egg’s bottom and dip it into the melted white chocolate. Let any excess drip off before placing it back onto parchment paper. Timing is key here—remove that toothpick before it hardens too much!
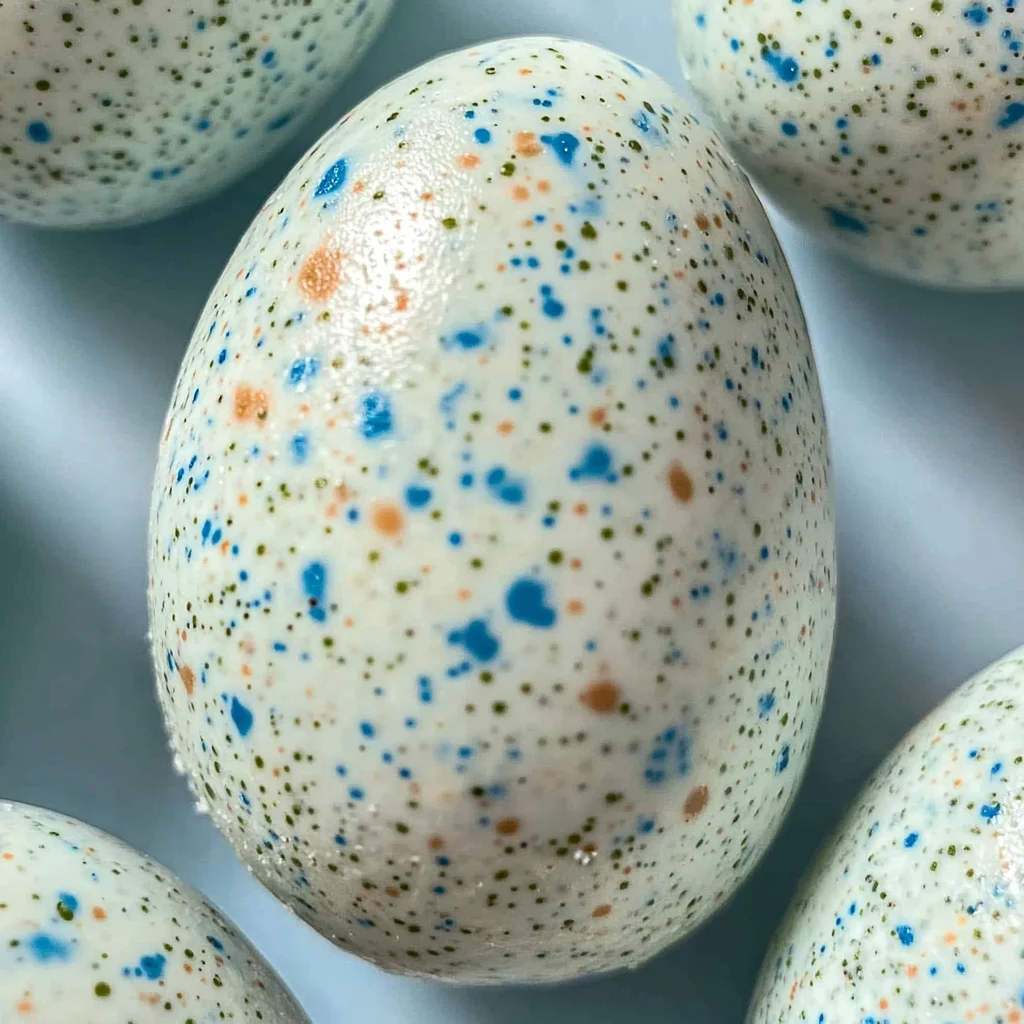
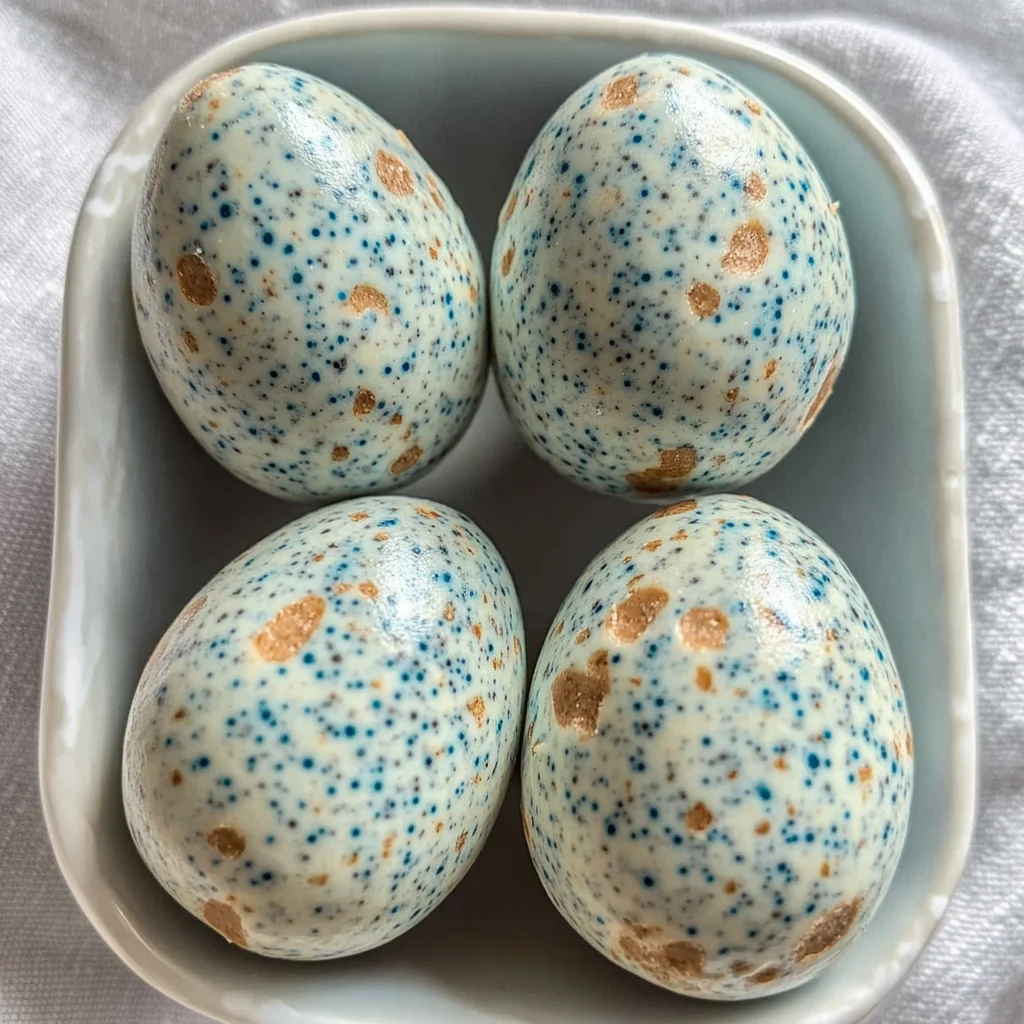
Step 6: Add Speckles
To create those charming speckles reminiscent of robin’s eggs, dip a pastry brush into your cocoa powder/water mixture. Hold it above each egg and flick it gently to create charming speckles all over. Just remember—it can get messy, so wearing an apron is highly recommended!
Step 7: Chill Until Set
Refrigerate your beautifully decorated eggs until the chocolate has dried out completely—about ten minutes should do it. Then they’re ready to be enjoyed!
Get ready to share these delightful Peanut Butter Easter Eggs with friends and family—they’re sure to become a beloved tradition! Happy indulging!
Pro Tips for Making Peanut Butter Easter Eggs
Making your own Peanut Butter Easter Eggs is a delightful experience, and with a few handy tips, you can ensure they turn out perfectly every time!
- Use natural peanut butter: Opt for runny, natural peanut butter without added sugar. It ensures a creamy filling that mimics the classic candy texture.
- Freeze the eggs before coating: Freezing the shaped eggs helps the chocolate coating firm up quickly and prevents pooling. This step is key to achieving a smooth finish.
- Experiment with colors: If you want to get creative, feel free to mix different natural colorings in your white chocolate! This can add a fun twist to your eggs and make them visually appealing.
- Practice your speckling technique: Flicking the cocoa mixture from a distance will give you more control over how much speckling appears on each egg. Practice makes perfect, so don’t worry if it gets a bit messy!
- Store properly: To keep your Peanut Butter Easter Eggs fresh, store them in an airtight container in the refrigerator. This will keep them firm and delicious for longer.
How to Serve Peanut Butter Easter Eggs
These homemade treats are not just tasty; they also make for an impressive presentation! Here are some fun ideas for serving them that will wow your friends and family.
Garnishes
- Chopped nuts: Sprinkling some chopped almonds or walnuts on top adds a delightful crunch and complements the peanut butter flavor.
- Edible flowers: A few edible flowers or mint leaves can bring a touch of elegance to your plate and enhance the visual appeal.
Side Dishes
- Fresh fruit platter: A colorful assortment of seasonal fruits like strawberries, blueberries, and kiwi not only balances out the sweetness but also adds freshness to your dessert table.
- Yogurt parfait: Layer some Greek yogurt with granola and berries for a creamy side that complements the richness of the peanut butter eggs while providing additional nutrition.
- Carrot sticks with hummus: For a light and crunchy side, serve carrot sticks with hummus. The earthy flavors provide a nice contrast to the sweet eggs while keeping it healthy.
With these tips and serving suggestions, your Peanut Butter Easter Eggs will not only taste great but also look fantastic on any dessert table! Enjoy crafting these delightful treats this season.
Make Ahead and Storage
These Peanut Butter Easter Eggs are perfect for meal prep! You can make them ahead of time, and they store beautifully, making them a delightful treat to enjoy whenever you need a sweet fix.
Storing Leftovers
- Store any leftover Peanut Butter Easter Eggs in an airtight container.
- Keep them in the refrigerator for up to one week.
- For best taste and texture, consume within a few days.
Freezing
- To freeze, place the eggs in a single layer on a baking sheet lined with parchment paper.
- Freeze until solid, then transfer them to an airtight container or freezer bag.
- They can be frozen for up to three months. Thaw in the fridge before enjoying.
Reheating
- These treats are best enjoyed cold or at room temperature.
- If you’d like to soften them slightly, let them sit out for about 10-15 minutes before serving.
FAQs
If you have some questions about making these delicious treats, you’re not alone! Here are some common queries.
Can I use a different nut butter for Peanut Butter Easter Eggs?
Absolutely! Feel free to substitute almond butter or cashew butter if you prefer. Just ensure that it’s runny and natural for the best results.
How should I color my Peanut Butter Easter Eggs?
You can use blue spirulina and matcha powder as we did in the recipe. Alternatively, choose food-safe dyes that fit your desired color scheme!
Are these Peanut Butter Easter Eggs gluten-free?
Yes! This recipe uses almond flour instead of regular flour, making these eggs gluten-free. Always check your ingredients to be sure.
How long do these Peanut Butter Easter Eggs last?
When stored properly in the refrigerator, they will stay fresh for up to one week. If you freeze them, they can last for three months!
Final Thoughts
I hope you enjoy making these delightful Peanut Butter Easter Eggs as much as I do! They’re not only visually stunning but also packed with delicious flavor that will surely impress your friends and family. Whether you’re celebrating a special occasion or just looking for a sweet treat, these homemade goodies are sure to bring smiles all around. Get ready to share the joy of baking—have fun!
Peanut Butter Easter Eggs
Get ready to delight your taste buds with these homemade Peanut Butter Easter Eggs! This fun and festive treat blends creamy peanut butter with a sweet white chocolate coating, making it a perfect addition to your spring celebrations. Easy to make and customizable for any occasion, these treats are a hit with both kids and adults. Shape them into adorable egg forms, decorate with natural colors, and enjoy the joy of creating something special together. Whether you’re celebrating Easter or just looking for a sweet snack, these Peanut Butter Easter Eggs will surely impress!
- Prep Time: 20 minutes
- Cook Time: 10 minutes
- Total Time: 30 minutes
- Yield: Approximately 12 servings (Peanut Butter Easter Eggs) 1x
- Category: Dessert
- Method: No-Bake
- Cuisine: American
Ingredients
- 1 1/4 cup natural, runny peanut butter (no sugar added)
- 1/4 cup maple syrup
- 1/4 cup powdered sugar
- 1/3 cup almond flour
- 1/2 teaspoon vanilla extract
- Pinch of salt
- 8 ounces white chocolate melting wafers
- 2 teaspoons coconut oil
- 1/2 teaspoon blue spirulina + 1/4 teaspoon matcha powder (or use a 2:1 ratio of any blue and green food dye)
- 1 teaspoon cocoa powder + 1 tablespoon water
Instructions
- In a mixing bowl, combine peanut butter, maple syrup, powdered sugar, almond flour, vanilla extract, and salt. Mix until smooth.
- Shape the mixture into egg-shaped ovals using about 2 tablespoons of the filling for each.
- Freeze the shaped eggs on a parchment-lined baking sheet for about 30 minutes.
- Melt white chocolate wafers and coconut oil in a microwave-safe bowl at 15-20 second intervals until fully melted.
- Dip each semi-frozen egg into the melted chocolate and let excess drip off before placing back onto parchment paper.
- Allow the chocolate to set in the refrigerator for about 10 minutes before serving.
Nutrition
- Serving Size: 1 serving
- Calories: 140
- Sugar: 8g
- Sodium: 50mg
- Fat: 9g
- Saturated Fat: 4g
- Unsaturated Fat: 5g
- Trans Fat: 0g
- Carbohydrates: 12g
- Fiber: 1g
- Protein: 3g
- Cholesterol: 0mg