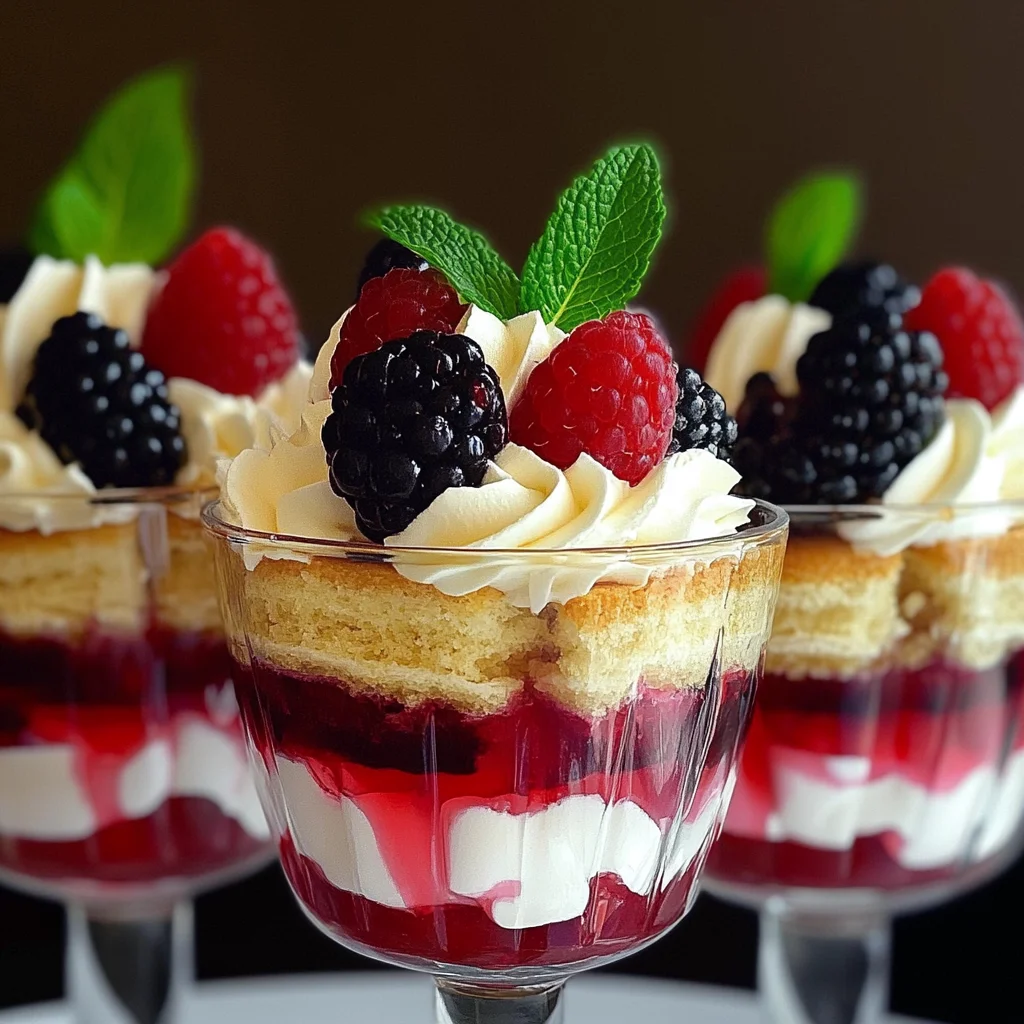
Mini Trifles
If you’re looking for a delightful dessert that’s sure to impress, you’ve come to the right place! These Mini Trifles are a personal favorite of mine, and I can’t wait to share them with you. They are incredibly versatile and perfect for any occasion—whether you’re hosting a family gathering, celebrating a special event, or simply treating yourself after a long week. The vibrant layers of jelly, cream, and fresh berries create not only a feast for the taste buds but also a stunning visual treat.
What makes these Mini Trifles even more special is their make-ahead convenience. You can whip them up the day before and let them chill in the fridge until you’re ready to serve. Trust me, your guests will be wowed by this charming dessert!
Why You’ll Love This Recipe
- Easy to prepare: With simple steps and minimal fuss, these trifles come together quickly.
- Family-friendly: Kids adore the fun layers, making it an excellent choice for family desserts.
- Make-ahead option: Prepare them in advance, saving you time on busy days or special occasions.
- Deliciously versatile: You can mix and match flavors and fruits based on what you love or have on hand.
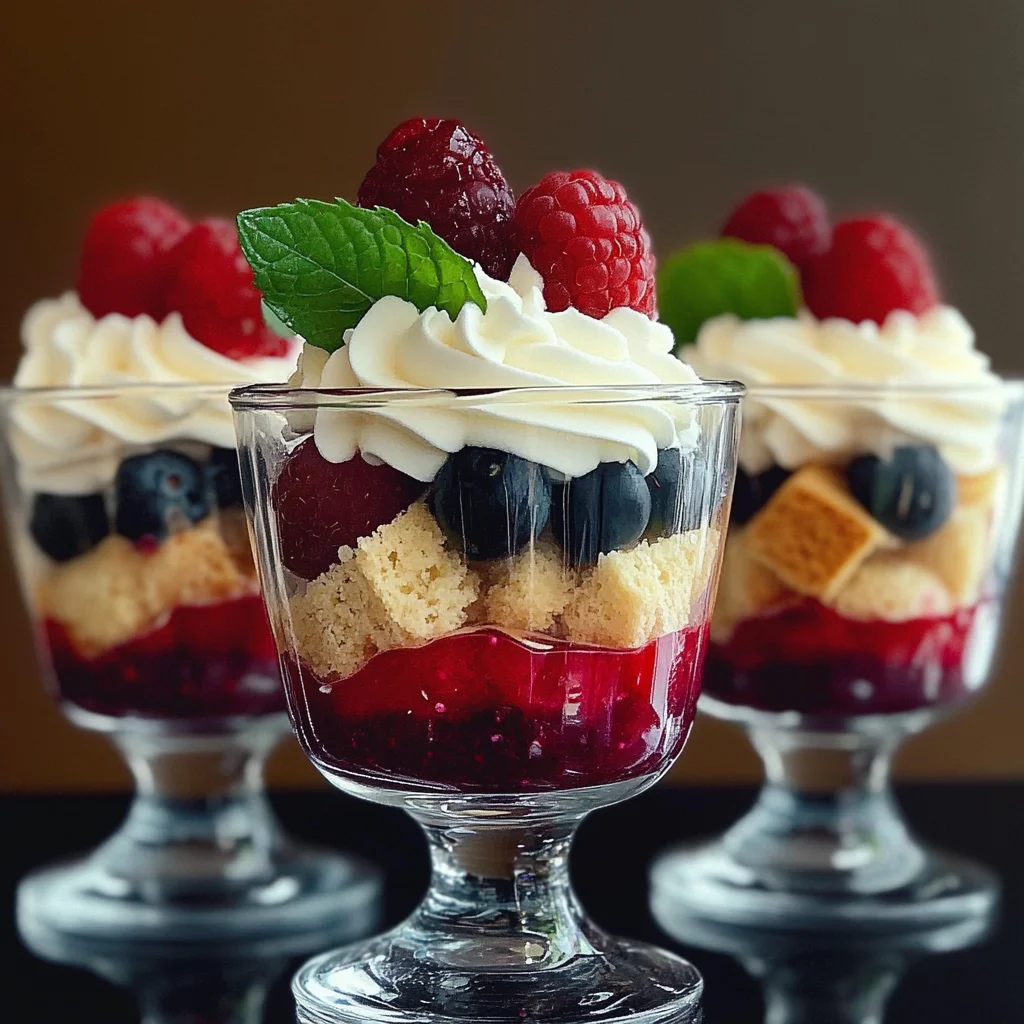
- Impressive presentation: The beautiful layers look fabulous in individual servings; they’re almost too pretty to eat!
Ingredients You’ll Need
In this recipe, we use simple and wholesome ingredients that create such rich flavors. Gather these goodies to get started on your Mini Trifles!
For the Jelly Layer
- 85 grams jelly crystals (1 packet Aeroplane jelly if you’re in Australia)
- 125 mls cream (tinned cream, thickened cream or heavy cream)
For the Sponge Base
- 12 pieces Tiramisu sponge fingers (about 1 cup fresh sponge chopped in small squares)
- 1/2 cup apple juice (or juice for a non-alcoholic version)
For the Custard Layer
- 1 1/2 cups custard (bought or home-made)
For the Berry Layer
- 400 grams berries (I used strawberries, raspberries, and blackberries)
For the Topping
- 200 mls thickened cream (known as heavy cream in US)
- 1 teaspoon custard powder
- Mint leaves for decorating
Variations
One of the best things about this recipe is its flexibility! You can easily adapt it to suit your tastes or dietary preferences.
- Swap the fruit: Use seasonal fruits like peaches or mangoes instead of berries for a tropical twist.
- Change the sponge: Try ladyfingers or cake cubes instead of Tiramisu sponge fingers for different textures.
- Play with flavors: Add vanilla extract to your cream mixture for an extra flavor boost.
- Make it chocolatey: Fold some cocoa powder into your whipped cream or add chocolate shavings between layers.
How to Make Mini Trifles
Step 1: Prepare the Jelly
Begin by making up your jelly according to package instructions. This should yield about 2 cups of jelly. Allow it to cool slightly before moving on to the next step. This layer provides a lovely sweetness and vibrant color!
Step 2: Create the First Layer
Take 1 1/4 cups of the liquid jelly mixture and fill the bottoms of six small dessert dishes or glasses. Place both these glasses and any remaining jelly mixture into the fridge. The chilling process is crucial as it helps set this first layer.
Step 3: Whip Up Some Flummery
Once your remaining jelly mixture is close to setting but still pourable—this may take about 1-2 hours—combine it with your cream. Beat on high speed for about four minutes until fluffy. This flummery adds a light texture that balances out all those sweet layers.
Step 4: Assemble Your Layers
After letting the jelly set partially, carefully pour that creamy mixture over each glass’s chilled jelly layer—this creates another delightful layer! Allow everything to set again while you get ready for the next steps.
Step 5: Add Sponge Fingers
Crush your sponge fingers in a tray and drizzle over either apple juice or juice if you’re making it kid-friendly. Layer these soaked sponge pieces on top of your flummery carefully—this gives each bite an exciting texture.
Step 6: Pour in Custard
Next up is adding a generous layer of custard over those sponge fingers! It’s where all that creamy goodness comes into play; don’t skimp here!
Step 7: Top with Berries
Sprinkle chopped berries over the custard layer. I like using strawberries, raspberries, and blackberries because they add vibrant colors and tartness—such an irresistible combination! Remember to save six whole berries for decorating later.
Step 8: Whip Up Some Cream Topping
In a separate bowl, whip together thickened cream and custard powder until stiff peaks form. This will be your elegant topping that ties everything together beautifully!
Step 9: Finish with Flair
Pipe or dollop your whipped cream onto each trifle layer before finishing off with one reserved berry and a sprig of mint on top. This final touch adds elegance and makes every trifle look like it’s from a fancy restaurant!
And there you have it—your Mini Trifles are ready to be enjoyed!
Pro Tips for Making Mini Trifles
Creating the perfect mini trifles is all about layering and flavors, so here are some pro tips to ensure your trifles turn out beautifully every time!
- Choose the Right Glassware: Using clear dessert glasses or small mason jars allows your guests to admire those stunning layers. Presentation is key in making trifles visually appealing!
- Let Each Layer Set: Allow each layer to set slightly before adding the next. This helps prevent muddling of the layers, keeping them distinct and beautiful.
- Experiment with Flavors: Don’t hesitate to mix up the berries or even add a hint of lemon zest to your custard. Different flavors can elevate the trifle even further and make it unique!
- Whip Cream Just Right: Be careful not to over-whip your cream; aim for stiff peaks. This ensures that your cream holds its shape while still being light and fluffy.
- Make Ahead for Convenience: Prepare your mini trifles a day in advance. This not only saves you time on serving day but also allows the flavors to meld together beautifully.
How to Serve Mini Trifles
Serving mini trifles can be just as delightful as making them! Here are some ideas that will impress your guests and make dessert time even more special.
Garnishes
- Fresh Mint Leaves: A sprig of mint adds a pop of color and a fresh aroma, enhancing both presentation and flavor.
- Chocolate Shavings: A sprinkle of chocolate shavings on top gives a decadent touch that pairs wonderfully with the sweetness of the dessert.
- Edible Flowers: For an elegant look, consider using edible flowers like pansies or violets. They add a lovely color contrast and sophistication.
Side Dishes
- Fruit Salad: A refreshing fruit salad complements the richness of the mini trifles while providing a lighter option for those who may want something less sweet.
- Cheese Platter: Offer a selection of cheeses paired with crackers and dried fruits. The savory elements balance the sweetness of the trifles perfectly.
- Vanilla Ice Cream: Light and creamy vanilla ice cream provides a classic combo with desserts, allowing guests to enjoy an additional texture alongside their trifles.
- Coffee or Tea: Serving coffee or herbal tea enhances the overall experience, providing a warm contrast to the chilled dessert and helping cleanse the palate after each bite.
Now you’re all set to make, serve, and enjoy these delightful mini trifles! With their vibrant layers and delicious flavors, they’re sure to be a hit at any gathering. Happy indulging!
Make Ahead and Storage
These delightful mini trifles are perfect for meal prep, allowing you to make them ahead of time for a hassle-free dessert option that will impress your guests. You can prepare the layers in advance and assemble them just before serving.
Storing Leftovers
- Store any leftover mini trifles in an airtight container in the refrigerator.
- Consume within 2-3 days for the best taste and texture.
- Avoid freezing leftovers, as the cream layers may not maintain their consistency.
Freezing
- It is not recommended to freeze mini trifles due to the dairy components.
- The jelly layer can be frozen separately if needed, but always thaw it in the refrigerator before combining with other layers.
Reheating
- There’s no need to reheat mini trifles; they are best served cold directly from the fridge.
- If you prefer a slightly softer jelly layer, allow it to sit at room temperature for a few minutes before serving.
FAQs
If you have questions about making mini trifles, you’re in the right place! Here are some common queries answered.
Can I use different fruits in my Mini Trifles?
Absolutely! Feel free to mix and match your favorite fruits. Berries work beautifully, but you can also use sliced bananas, peaches, or even tropical fruits like mangoes for a different flair.
How long do Mini Trifles last?
Mini trifles can last up to 2-3 days in the refrigerator if stored properly. Just cover them well to maintain freshness!
What is a good substitute for jelly crystals in Mini Trifles?
If you’re looking for alternatives, consider using agar-agar or fruit puree. Both options will provide a similar texture while keeping your dessert delicious and gelatin-free.
How do I make my Mini Trifles more festive?
To elevate your mini trifles for special occasions, consider adding layers of crushed cookies or flavored whipped cream. You could also decorate with edible flowers or colorful sprinkles for an extra touch of charm!
Final Thoughts
I hope this recipe brings a little joy to your kitchen! These mini trifles are not only visually stunning but also bursting with flavor. They’re a fantastic way to impress friends and family at gatherings or simply treat yourself during the week. Enjoy making these delightful desserts—I’d love to hear how yours turn out!
Mini Trifles

Indulge in the delightful layers of Mini Trifles, a charming dessert that will surely impress your guests! These individual trifles combine vibrant jelly, fluffy cream, and fresh berries to create not only a visual feast but also an explosion of flavors. Perfect for any occasion—from family gatherings to casual weeknight treats—these trifles are easy to prepare and even easier to enjoy. The best part? They can be made ahead of time, allowing you to relax while your dessert dazzles. Each layer offers a unique texture and taste, making every bite a delightful experience.
- Prep Time: 30 minutes
- Cook Time: N/A
- Total Time: 0 hours
- Yield: Serves 6
- Category: Dessert
- Method: Chilling
- Cuisine: American
Ingredients
- 85 grams jelly crystals
- 125 mls cream
- 12 pieces Tiramisu sponge fingers
- 1/2 cup apple juice
- 1 1/2 cups custard
- 400 grams mixed berries
- 200 mls thickened cream
- 1 teaspoon custard powder
Instructions
- Prepare the jelly according to package instructions and allow it to cool.
- Pour about 1 1/4 cups of the liquid jelly into small dessert glasses and chill until set.
- Combine remaining jelly with cream and whip until fluffy.
- Layer the creamy mixture over the set jelly in each glass.
- Drizzle soaked sponge fingers with apple juice and layer them on top.
- Add a layer of custard over the sponge fingers.
- Top with chopped berries, reserving some for garnish.
- Whip thickened cream with custard powder until stiff peaks form; pipe onto trifles.
- Finish with reserved berries and mint leaves for decoration.
Nutrition
- Serving Size: 1 trifle (150g)
- Calories: 290
- Sugar: 28g
- Sodium: 45mg
- Fat: 17g
- Saturated Fat: 10g
- Unsaturated Fat: 5g
- Trans Fat: 0g
- Carbohydrates: 31g
- Fiber: 2g
- Protein: 4g
- Cholesterol: 40mg