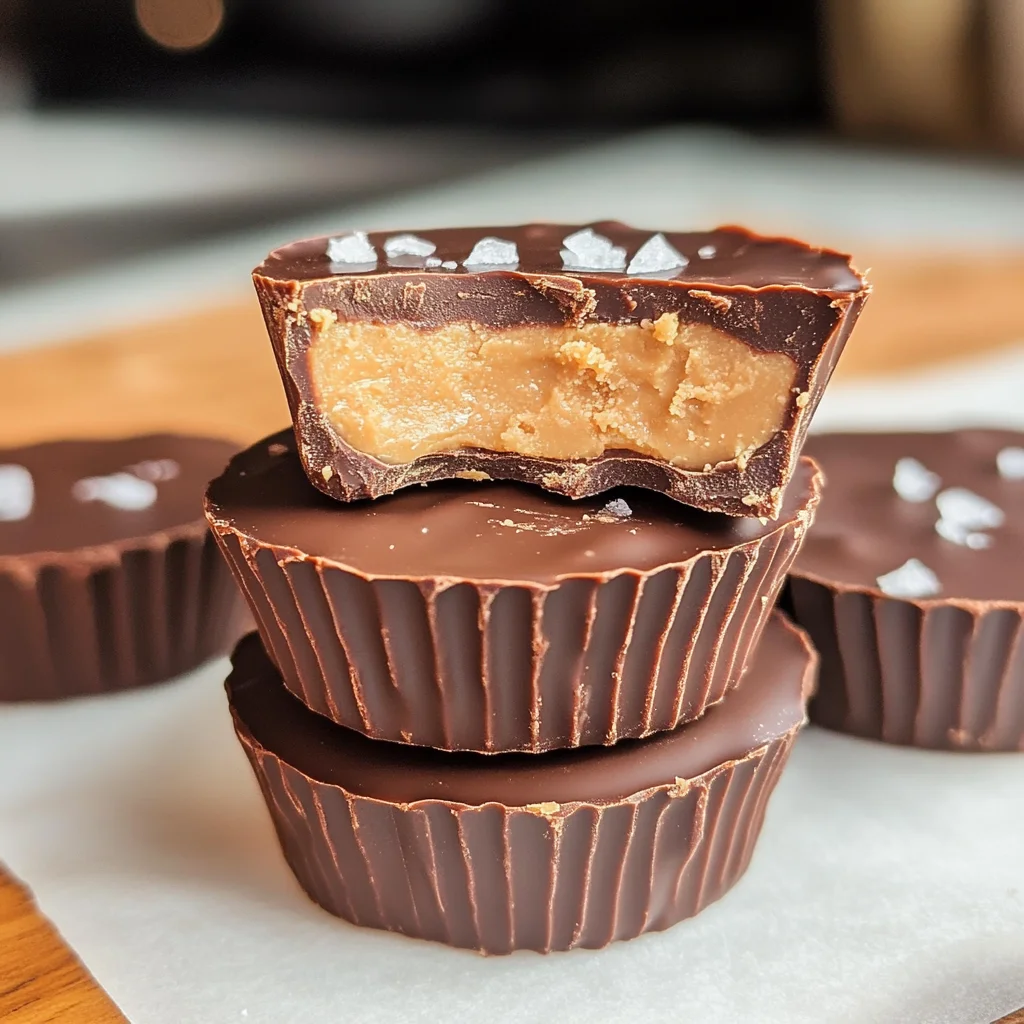
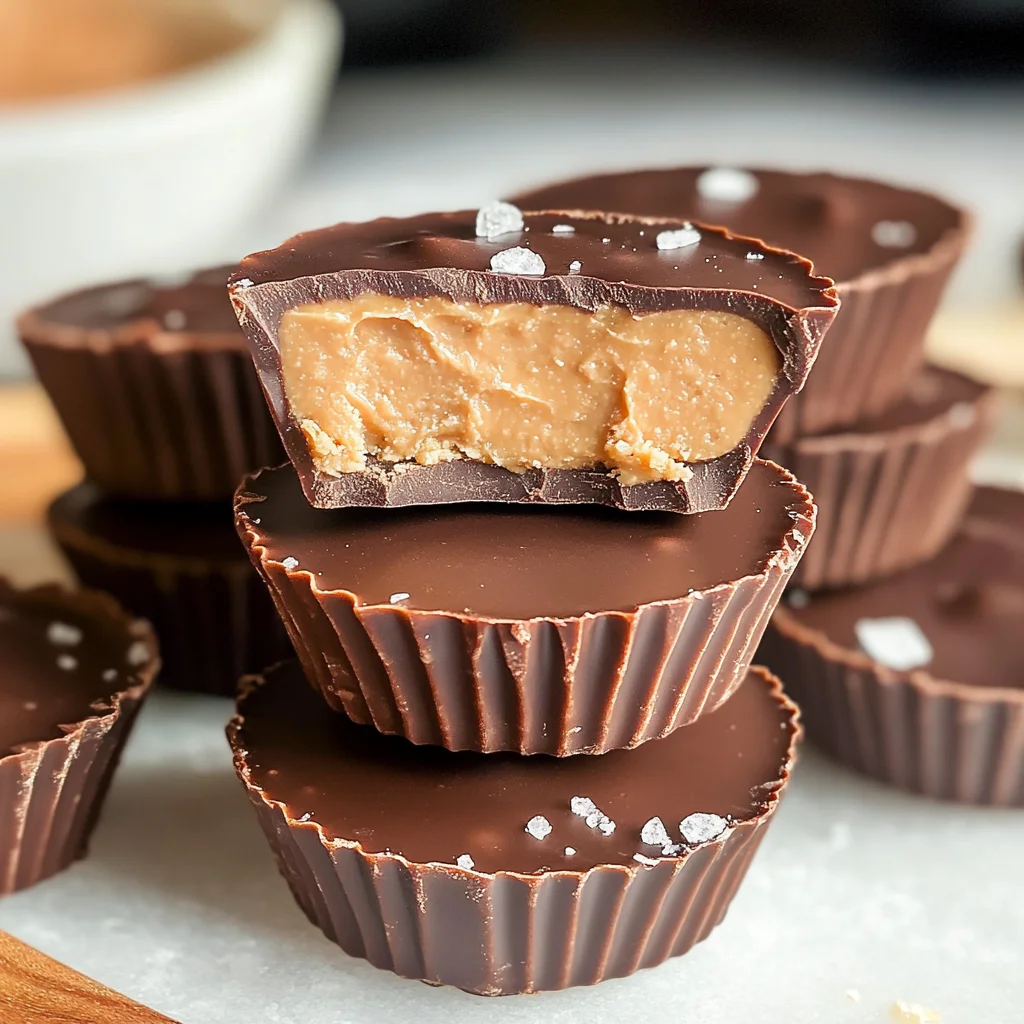
Easy Homemade Reese’s Cups
If you’re looking for a fun and nostalgic treat that combines creamy peanut butter and rich chocolate, then you’re in for a treat with these Easy Homemade Reese’s Cups! This recipe is not only simple to make but also perfect for any occasion—whether it’s a busy weeknight dessert or a sweet addition to your next family gathering. Every bite of these delightful cups brings back childhood memories, making it hard to resist reaching for just one more!
These homemade treats are so easy to whip up, and the best part is that they require no baking. You can enjoy these delicious bites in just about 30 minutes, and they’re sure to impress friends and family alike. Let’s dive into why this recipe makes such a wonderful addition to your dessert repertoire!
Why You’ll Love This Recipe
- Super easy to prepare: With just a handful of ingredients, you’ll have these tasty treats ready in no time.
- Family-friendly fun: Making these cups can be a great activity to do with kids. They’ll love the hands-on approach!
- Make-ahead convenience: These tasty bites can be made ahead of time and stored in the fridge, making them perfect for parties or snacks.
- Delicious flavor combination: The balance of creamy peanut butter and rich chocolate is simply irresistible!
- Customizable options: You can easily tweak the ingredients or toppings based on your preferences.
Ingredients You’ll Need
To create your own Easy Homemade Reese’s Cups, gather some simple and wholesome ingredients. You might already have most of them in your pantry!
For the Chocolate Shell
- 1 cup semi-sweet or dark chocolate chips (at least 60% cacao)
For the Peanut Butter Filling
- 1/2 cup creamy peanut butter
- 1/4 cup powdered sugar or 2 tablespoons of brown sugar
- 2 tablespoons butter (optional)
For Finishing Touches
- Sea salt flakes for finishing
- Mini muffin liners or silicone molds
Variations
This recipe is wonderfully flexible! Here are some fun ideas to make your Easy Homemade Reese’s Cups even more exciting:
- Add some crunch: Mix in chopped nuts or crushed pretzels into the peanut butter filling for an added texture.
- Switch up the chocolate: Try using milk chocolate or white chocolate for different flavor profiles.
- Flavor it up: Add a splash of vanilla extract or a sprinkle of cinnamon into the peanut butter mixture for an extra layer of flavor.
- Go nut-free: Substitute sunflower seed butter if you want to keep it nut-free; it’ll still be delicious!
How to Make Easy Homemade Reese’s Cups
Step 1: Prepare Your Molds
Start by preparing a baking tray with mini muffin liners or silicone molds. This step ensures that your cups will pop out easily once they’re set.
Step 2: Melt the Chocolate
Melt two-thirds of the chocolate chips in a microwave-safe bowl. Heat them in bursts of 20 to 30 seconds, stirring until smooth. This method helps prevent burning while achieving that glossy finish.
Step 3: Combine Remaining Chocolate Chips
Once melted, add in the remaining chocolate chips and stir until everything is shiny and well-combined. This creates enough chocolate for both the shell and sealing your cups.
Step 4: Create the Chocolate Shells
Spoon about a teaspoon of melted chocolate into each liner, rotating the tray gently so that it coats the edges too. This step is crucial as it forms the beautiful shell that holds all that yummy filling inside!
Step 5: Chill Until Firm
Pop your tray into the freezer for about 5–7 minutes until the chocolate firms up nicely. This helps create a strong base for when we add our peanut butter filling.
Step 6: Make Your Peanut Butter Filling
In a bowl, mix together creamy peanut butter with powdered sugar and a pinch of salt until it’s spreadable. If you want it creamier, melt in some butter at this stage!
Step 7: Fill Each Chocolate Shell
Spoon a small dollop of that delicious peanut butter filling into each chocolate shell. Press down slightly to get rid of any air pockets—this ensures every cup is packed with flavor.
Step 8: Seal with More Chocolate
Top each filled cup with another one to two teaspoons of melted chocolate. This seals everything together beautifully, creating that classic Reese’s shape we all know and love.
Step 9: Flatten & Sprinkle
Gently tap the tray against your counter to flatten the tops. Now’s also your chance to sprinkle on those sea salt flakes for that perfect hint of savory contrast!
Step 10: Chill Until Set
Finally, chill your cups until fully set—about 20–30 minutes should do it! Once they’re ready, you can pop them out and enjoy your homemade delights.
Now you have everything you need to create these scrumptious Easy Homemade Reese’s Cups! Enjoy making them as much as you will enjoy eating them!
Pro Tips for Making Easy Homemade Reese’s Cups
Making your own Reese’s cups at home is not only fun but also a great way to customize flavors and textures. Here are some pro tips to ensure your cups turn out perfectly every time!
-
Use quality chocolate: Opting for high-quality semi-sweet or dark chocolate chips enhances the flavor and provides a smooth texture, making your treats even more enjoyable.
-
Chill between layers: Freezing the chocolate layers before adding the peanut butter filling helps to create clean and distinct layers, giving your homemade cups that professional finish.
-
Adjust sweetness to taste: Depending on your preference, feel free to modify the amount of powdered sugar or brown sugar in the peanut butter filling. This customization allows you to balance sweetness with the richness of the chocolate.
-
Experiment with nut butters: While creamy peanut butter is classic, feel free to try different nut butters like almond or cashew for a unique twist. Each type will lend its own distinctive flavor profile to your cups.
-
Store properly: Keep your Reese’s cups in an airtight container in the refrigerator for up to two weeks, or freeze them for longer storage. This ensures they stay fresh and delicious!
How to Serve Easy Homemade Reese’s Cups
Serving your Easy Homemade Reese’s Cups can be as delightful as making them! Whether it’s a cozy family gathering or a casual movie night, presenting these treats elegantly adds a special touch.
Garnishes
- Crushed nuts: Sprinkle finely chopped peanuts or other nuts on top for added crunch and a nutty flavor that complements the filling.
- Chocolate drizzle: Drizzling melted chocolate over the tops not only looks beautiful but also adds an extra layer of chocolaty goodness.
- Cocoa powder dusting: A light dusting of cocoa powder can enhance the presentation and add a sophisticated touch without overwhelming sweetness.
Side Dishes
- Fresh fruit platter: A colorful assortment of berries, apples, and bananas provides a refreshing contrast to the rich sweetness of the Reese’s cups.
- Ice cream: Pair these delightful treats with your favorite dairy-free ice cream for an indulgent dessert experience. The creamy texture balances beautifully with the crunchy cups.
- Popcorn: Serve some lightly salted or caramel popcorn alongside your cups for a fun snack mix that adds both saltiness and texture.
- Coffee or herbal tea: A warm beverage can complement the sweetness of the Reese’s cups perfectly. Choose a rich coffee blend or soothing herbal tea for a comforting pairing.
With these serving suggestions and pro tips, you’re all set to enjoy or share your delightful homemade Reese’s Cups! Each bite is sure to bring back memories while creating new ones. Happy indulging!
Make Ahead and Storage
These Easy Homemade Reese’s Cups are perfect for meal prep! You can whip up a batch in advance and store them for future enjoyment. They’re great as a quick snack or a sweet treat anytime you need a pick-me-up.
Storing Leftovers
- Store the cups in an airtight container at room temperature for up to 1 week.
- If it’s warm in your area, it’s best to keep them in the refrigerator to prevent melting.
Freezing
- Place the cups in a single layer on a baking sheet and freeze until solid.
- Transfer them to an airtight container or freezer bag, separating layers with parchment paper.
- They can be frozen for up to 3 months.
Reheating
- If you want to enjoy them soft, let the cups sit at room temperature for about 10-15 minutes before eating.
- For a quick melt, place them in the microwave for just 5-10 seconds.
FAQs
Here are some common questions you might have about making these delightful treats!
How do I make Easy Homemade Reese’s Cups vegan?
To make these Easy Homemade Reese’s Cups vegan, simply use dairy-free chocolate chips and substitute the butter with coconut oil or leave it out entirely.
Can I use crunchy peanut butter instead of creamy?
Absolutely! Crunchy peanut butter will add an extra texture to your Easy Homemade Reese’s Cups, making them even more delightful.
How do I prevent my chocolate from seizing?
Make sure that no moisture gets into your melting chocolate. Use dry utensils and bowls when melting your chocolate chips to keep it smooth and silky.
What can I use if I don’t have mini muffin liners?
If you don’t have mini muffin liners, silicone molds work wonderfully too. Just ensure they are well greased to help release the cups easily once set.
Final Thoughts
I hope you find joy in making these Easy Homemade Reese’s Cups! They are not only simple to prepare but also bring back such lovely memories of childhood treats. Whether you’re sharing them with friends or savoring them solo, I’m sure they’ll bring a smile to your face. Enjoy crafting this delicious recipe, and don’t hesitate to reach out with your thoughts or variations!
Easy Homemade Reese’s Cups

Indulge in the nostalgia of childhood with these Easy Homemade Reese’s Cups! Combining creamy peanut butter and rich chocolate, this no-bake dessert is a perfect treat for any occasion—whether it’s a family gathering or a cozy night in. With just a handful of ingredients and only 30 minutes of prep time, you can create delicious bites that will impress your friends and satisfy your sweet tooth. Customize them to your taste by adding crunchy nuts, experimenting with different types of chocolate, or even making them nut-free. Get ready to delight in these delightful homemade treats!
- Prep Time: 15 minutes
- Cook Time: 15 minutes
- Total Time: 30 minutes
- Yield: Approximately 12 cups 1x
- Category: Dessert
- Method: No-bake
- Cuisine: American
Ingredients
- 1 cup semi-sweet or dark chocolate chips (at least 60% cacao)
- 1/2 cup creamy peanut butter
- 1/4 cup powdered sugar or 2 tablespoons brown sugar
- Sea salt flakes for finishing
- Mini muffin liners or silicone molds
Instructions
- Prepare mini muffin liners in a baking tray.
- Melt two-thirds of the chocolate chips in a microwave-safe bowl, stirring until smooth.
- Mix in remaining chocolate chips until glossy.
- Spoon melted chocolate into liners, coating edges.
- Chill for 5-7 minutes until firm.
- In a bowl, combine peanut butter with powdered sugar until smooth.
- Fill each chocolate shell with the peanut butter mixture.
- Top with more melted chocolate to seal.
- Tap to flatten and sprinkle sea salt flakes.
- Chill until fully set (20-30 minutes).
Nutrition
- Serving Size: 1 serving
- Calories: 139
- Sugar: 8g
- Sodium: 50mg
- Fat: 9g
- Saturated Fat: 3g
- Unsaturated Fat: 6g
- Trans Fat: 0g
- Carbohydrates: 12g
- Fiber: 1g
- Protein: 3g
- Cholesterol: 3mg