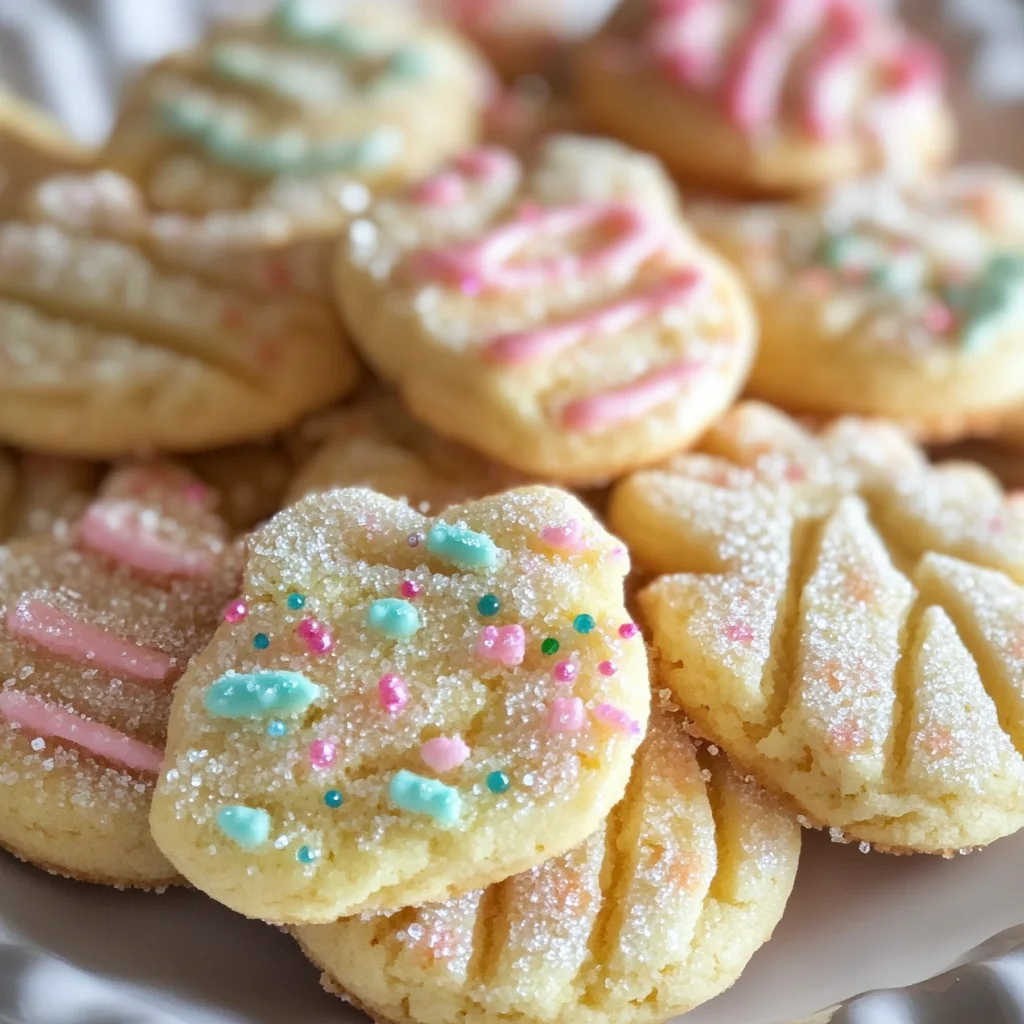
Easter Shortbread Cookies
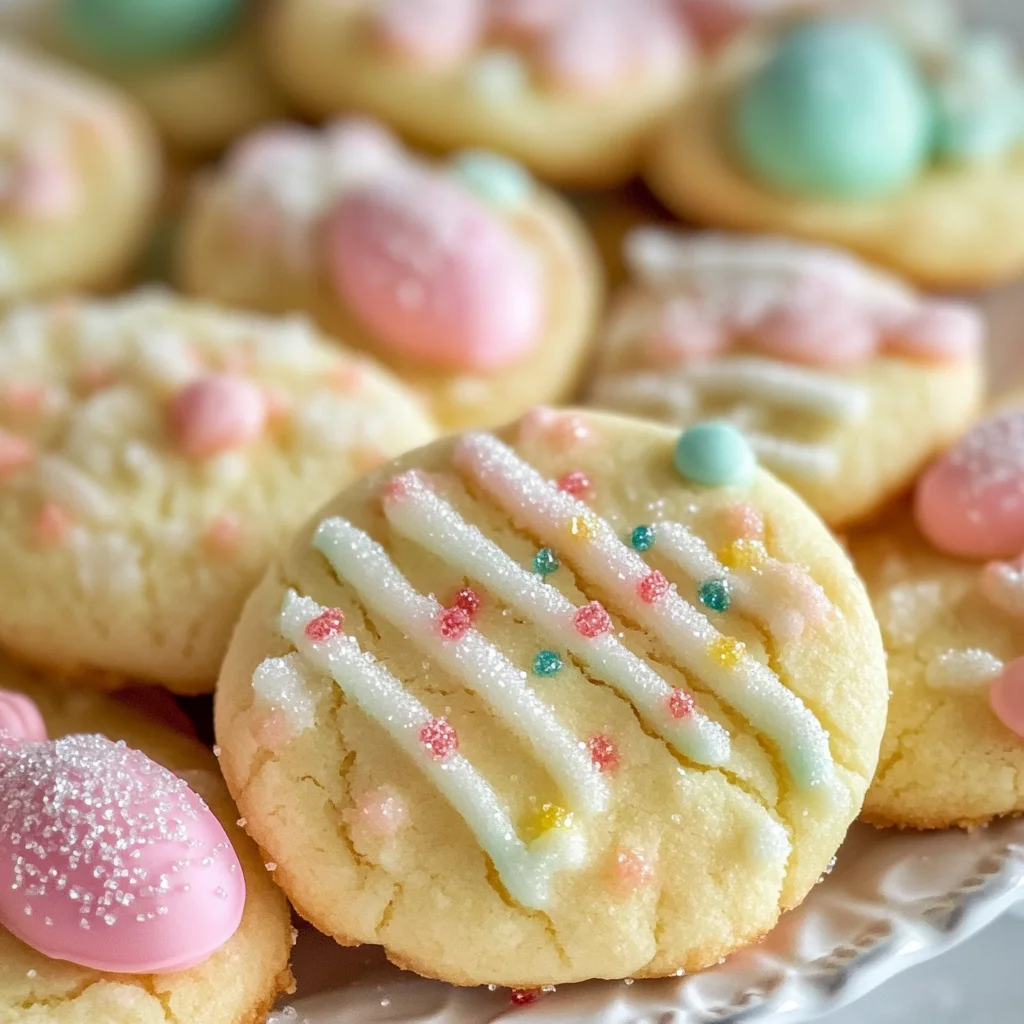
If you’re looking for a delightful treat to celebrate the spring season, then these Easter Shortbread Cookies are just what you need! They capture the essence of Easter with their cute shapes and pastel colors, making them perfect for family gatherings or simply enjoying at home. What I love most about this recipe is how easy it is to whip up a batch, even if you’re busy. Just imagine the joy on your loved ones’ faces when they see these beautiful cookies!
These cookies are not only delicious but also versatile. You can decorate them however you like, making them a fun project for kids and adults alike. Plus, they make wonderful gifts or party favors during the holiday season!
Why You’ll Love This Recipe
- Quick to Prepare: In just 25 minutes, you can have freshly baked cookies ready to enjoy.
- Family-Friendly Fun: Kids will love helping to shape and decorate these adorable cookies.
- Customizable Decorations: Use different cookie cutters and sprinkles to match any occasion.
- Melt-in-Your-Mouth Goodness: The buttery flavor combined with the delicate texture makes each bite irresistible.
Ingredients You’ll Need
Let’s gather some simple, wholesome ingredients for our Easter Shortbread Cookies. You likely have most of these in your pantry already!
For the Cookies
- 1 cup all-purpose flour
- 1/2 cup cornstarch
- 1/2 cup powdered sugar
- 3/4 cup butter
- Sanding sugar in pastel Easter colors
Variations
This recipe is wonderfully flexible! You can easily tweak it to suit your taste or what you have on hand.
- Add Flavoring: Mix in a teaspoon of vanilla extract or almond extract for an extra layer of flavor.
- Try Different Shapes: Use cookie cutters in various shapes like bunnies, eggs, or flowers for a festive touch.
- Experiment with Toppings: Instead of sanding sugar, top your cookies with colorful sprinkles or edible glitter.
- Make It Gluten-Free: Substitute all-purpose flour with a gluten-free blend for a delicious alternative.
How to Make Easter Shortbread Cookies
Step 1: Preheat the Oven
Preheat your oven to 300°F and line two baking sheets with parchment paper. This step ensures that your cookies bake evenly and don’t stick to the sheet.
Step 2: Sift Dry Ingredients
Sift together the all-purpose flour, cornstarch, and powdered sugar. If you don’t have a sifter handy, just whisk them together in a large bowl until well combined. This helps incorporate air into the mixture, which makes your cookies light and tender.
Step 3: Combine with Butter
Using a wooden spoon or your clean hands, blend in the butter until a soft dough forms. Be careful not to overwork it; as soon as it comes together, shape it into a ball. This keeps your cookies from becoming tough!
Step 4: Shape the Cookies
Shape the dough into one-inch balls and place them on your prepared baking sheets a few inches apart. They will spread slightly as they bake. Don’t worry about perfection—these charming little treats are meant to be fun!
Step 5: Flatten and Decorate
Press down lightly on each cookie with a floured fork before sprinkling them with sanding sugar or colorful sprinkles. The fork creates a lovely pattern while ensuring an even bake.
Step 6: Bake
Bake in your preheated oven for about 15 to 20 minutes. I recommend checking around 17 minutes—when they start turning golden at the edges, that’s your cue! Let them sit on the cookie sheet for two minutes before transferring them to a cooling rack.
And there you have it—your very own batch of delightful Easter Shortbread Cookies! Enjoy sharing them with friends and family (or keep some all to yourself). Happy baking!
Pro Tips for Making Easter Shortbread Cookies
Baking these delightful Easter shortbread cookies can be a breeze with a few handy tips!
-
Use cold butter: Starting with cold butter helps maintain the cookie’s shape and texture. It keeps the cookies from spreading too much during baking, resulting in perfectly shaped treats.
-
Chill the dough: If you find your dough is too soft to handle, pop it in the fridge for about 30 minutes. This will firm it up, making it easier to roll and cut into shapes.
-
Don’t skip the parchment paper: Lining your baking sheets with parchment paper ensures that your cookies don’t stick and makes cleanup a cinch. Plus, it helps to achieve an even bake!
-
Experiment with cookie shapes: Get creative with your cookie cutters! Traditional Easter shapes like bunnies and eggs are fun, but why not try flowers or stars for a unique twist?
-
Store properly: To keep your cookies fresh, store them in an airtight container at room temperature. They can last up to a week, but I bet they won’t last that long before being devoured!
How to Serve Easter Shortbread Cookies
Presenting your Easter shortbread cookies can be just as fun as baking them! With a little creativity, you can make them look as delightful as they taste.
Garnishes
- Pastel sprinkles: A sprinkle of colorful pastel sprinkles can add a festive flair to your cookies, making them even more appealing for your Easter gatherings.
- Edible flowers: Consider garnishing your cookies with small edible flowers like pansies or violets. They not only look beautiful but also add a touch of elegance.
Side Dishes
- Fresh fruit salad: A refreshing fruit salad made with seasonal fruits like strawberries, melons, and blueberries offers a light contrast to the sweetness of the cookies.
- Vanilla ice cream: Serve these cookies alongside a scoop of creamy vanilla ice cream for an indulgent dessert experience that everyone will love.
- Herbal tea: Pairing these cookies with soothing herbal teas like chamomile or mint creates a comforting afternoon treat that feels special.
- Cheese platter: For those who enjoy savory and sweet combinations, create a small cheese platter featuring mild cheeses and fresh berries. This balance rounds out the flavors beautifully.
Now that you have all the tips and serving suggestions, it’s time to gather your ingredients and get baking! Enjoy making these lovely Easter shortbread cookies and sharing them with family and friends. Happy baking!
Make Ahead and Storage
These Easter shortbread cookies are perfect for meal prep, allowing you to whip up a delightful batch ahead of time. Whether you’re planning a festive gathering or simply want some sweet treats on hand, these cookies store beautifully!
Storing Leftovers
- Store cooled cookies in an airtight container at room temperature for up to one week.
- Alternatively, keep them in the refrigerator for longer freshness.
Freezing
- To freeze, place the baked and cooled cookies in a single layer on a baking sheet and freeze until solid.
- Once frozen, transfer cookies to a freezer-safe bag or container, separating layers with parchment paper, and they’ll last for up to three months.
Reheating
- If you prefer warm cookies, reheat them in a preheated oven at 300°F for about 5 minutes.
- You can also microwave them for about 10-15 seconds if you’re looking for a quick treat.
FAQs
Here are some common questions about making Easter shortbread cookies:
Can I use different flavors in my Easter Shortbread Cookies?
Absolutely! You can add lemon zest, vanilla extract, or almond extract to the dough for a fun flavor twist.
How do I make my Easter Shortbread Cookies more colorful?
To add color, try using colored sanding sugar or sprinkles before baking. You could also drizzle with colored icing after they’ve cooled!
How long do Easter Shortbread Cookies last?
When stored properly in an airtight container, your Easter shortbread cookies will stay fresh for about one week at room temperature.
Can I substitute butter in the Easter Shortbread Cookies recipe?
Yes! You can replace butter with vegan margarine or coconut oil if you’re looking for dairy-free options.
Final Thoughts
I hope this Easter shortbread cookie recipe brings joy to your holiday celebrations! With their sweet simplicity and delightful shapes, they’re sure to be a hit with family and friends. Enjoy the baking process and the delicious results that come from it. Happy baking, and may your Easter be filled with love and sweetness!
Easter Shortbread Cookies

Easter Shortbread Cookies are a delightful springtime treat that brings joy to any celebration. With their charming shapes and pastel colors, these cookies are not only visually appealing but also incredibly easy to make. Perfect for family gatherings or as gifts, they offer a melt-in-your-mouth buttery goodness that everyone will love. The best part? You can customize these cookies with various decorations and flavors, making them a fun project for both kids and adults. In just 25 minutes, you can bake a batch of these scrumptious cookies and create lasting memories with your loved ones.
- Prep Time: 15 minutes
- Cook Time: 20 minutes
- Total Time: 35 minutes
- Yield: Approximately 24 cookies 1x
- Category: Dessert
- Method: Baking
- Cuisine: American
Ingredients
- 1 cup all-purpose flour
- 1/2 cup cornstarch
- 1/2 cup powdered sugar
- 3/4 cup butter
- Sanding sugar in pastel colors
Instructions
- Preheat your oven to 300°F (150°C) and line two baking sheets with parchment paper.
- Sift together the flour, cornstarch, and powdered sugar in a large bowl.
- Blend in the butter until a soft dough forms; do not overwork it.
- Shape the dough into one-inch balls and place them on the baking sheets.
- Flatten each cookie slightly with a floured fork and sprinkle with sanding sugar.
- Bake for 15-20 minutes, or until the edges turn golden. Let cool before serving.
Nutrition
- Serving Size: 1 cookie (25g)
- Calories: 110
- Sugar: 5g
- Sodium: 30mg
- Fat: 7g
- Saturated Fat: 4g
- Unsaturated Fat: 2g
- Trans Fat: 0g
- Carbohydrates: 10g
- Fiber: 0g
- Protein: 1g
- Cholesterol: 15mg