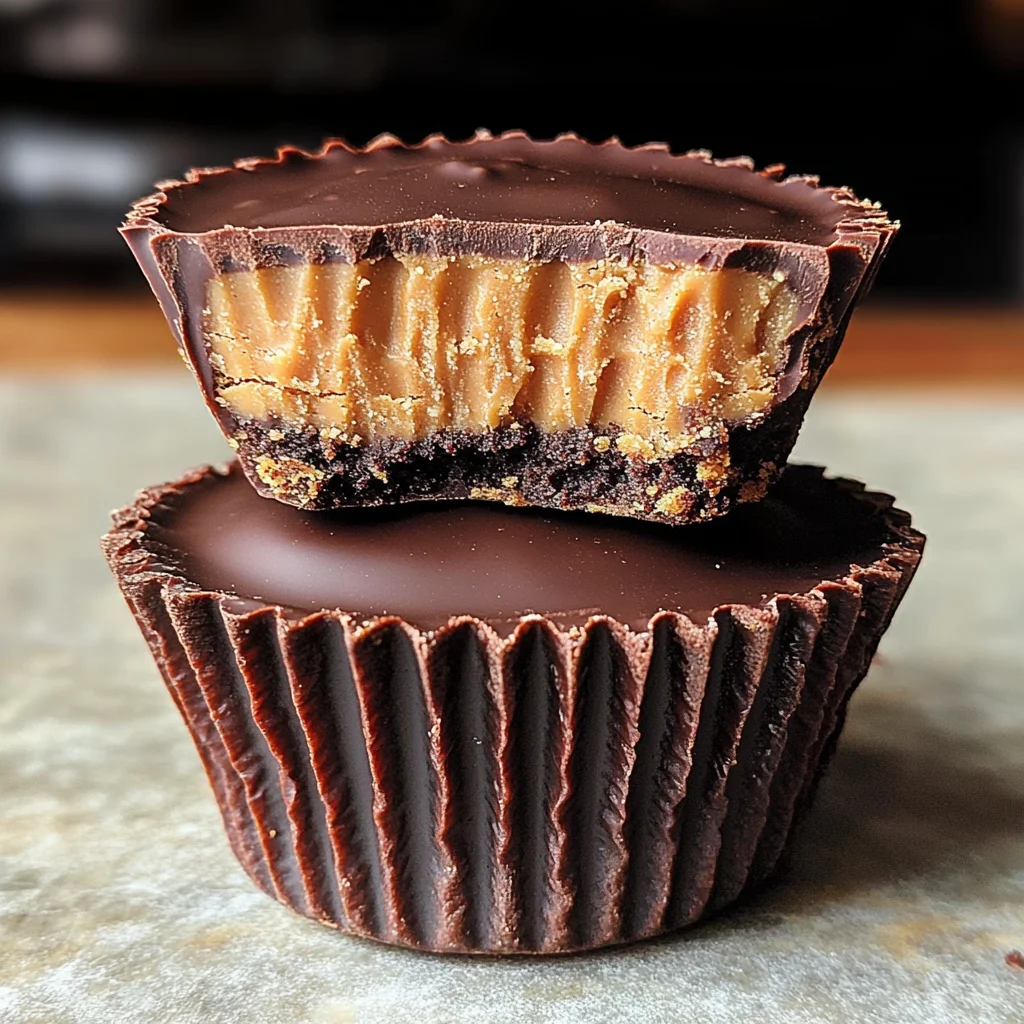
Reese’s Peanut Butter Cups recipe
If you’re looking for a delightful treat that combines creamy peanut butter and rich chocolate, then this Reese’s Peanut Butter Cups recipe is just what you need! This recipe has been a favorite in my home for years. It’s so easy to make and perfect for any occasion—whether it’s a busy weeknight craving or a family gathering. Once you take that first bite, you’ll understand why these homemade cups are loved by both kids and adults alike!
Why You’ll Love This Recipe
- Quick and Easy: With only 20 minutes of total prep time, you can whip these up in no time.
- Family-Friendly: Everyone loves peanut butter and chocolate! These treats are sure to bring smiles to your loved ones.
- Make-Ahead Delight: Prepare them in advance for parties or snacks; they keep well in the fridge!
- Customizable: Feel free to get creative with flavors or toppings. The possibilities are endless!
Ingredients You’ll Need
This Reese’s Peanut Butter Cups recipe uses simple, wholesome ingredients that you probably have on hand. Let’s gather what we need:
For the Peanut Butter Filling
- 10 graham crackers
- 1¼ cups powdered sugar
- 1½ cups melted peanut butter
For the Chocolate Coating
- 2 cups milk chocolate chips
Variations
This recipe is wonderfully flexible! Here are some fun variations to try:
- Add a Crunch: Mix in some chopped nuts like almonds or peanuts into the peanut butter filling for added texture.
- Swap the Chocolate: Try using dark chocolate chips instead of milk chocolate for a richer flavor.
- Flavor it Up: Add a dash of vanilla extract to the peanut butter mixture for an extra layer of taste.
- Go Dairy-Free: Use dairy-free chocolate chips if you’re looking for a vegan option.
How to Make Reese’s Peanut Butter Cups recipe
Step 1: Prepare the Graham Cracker Crumbs
Start by placing the graham crackers in a food processor or blender. Pulse until they turn into a fine powder. This forms the crunchy base of our peanut butter mixture, adding both texture and flavor.
Step 2: Combine Dry Ingredients
Next, transfer those lovely graham cracker crumbs into a large mixing bowl. Add in the powdered sugar and mix thoroughly. This step ensures that your filling will be sweet and consistently delicious!
Step 3: Incorporate Peanut Butter
Now it’s time to pour the melted peanut butter into your dry mixture. Stir well until everything is fully combined. You want it to be cohesive and pliable—that’s what will make our cups irresistible!
Step 4: Prepare the Chocolate Layer
In a microwave-safe bowl, melt the milk chocolate chips. Heat them gently, stirring every 30 seconds until they’re smooth. This gentle heating method prevents scorching and gives your chocolate that glossy finish we all love.
Step 5: Assemble the Cups
Begin by placing 15 cupcake liners on a baking sheet. Spoon a heaping tablespoon of melted chocolate into each liner, spreading it evenly across the bottom.
Afterward, add a heaping tablespoon of your delicious peanut butter mixture right on top of that silky chocolate layer.
Finally, finish off with another heaping tablespoon of melted chocolate, ensuring it completely covers the peanut butter layer.
Step 6: Set the Cups
Now comes the hard part—waiting! Place your assembled cups in the refrigerator for about an hour. This allows them to firm up perfectly while letting all those delicious flavors meld together.
And there you have it! A delightful Reese’s Peanut Butter Cups recipe that’s not only easy but utterly satisfying! Enjoy every bite!
Pro Tips for Making Reese’s Peanut Butter Cups recipe
Creating your own Reese’s Peanut Butter Cups at home is a delightful adventure, and a few handy tips can elevate your treat to perfection!
-
Use Fresh Ingredients: Always ensure your peanut butter and chocolate chips are fresh. This enhances the flavor and texture of your cups, making them taste even more delicious.
-
Don’t Overheat Chocolate: When melting chocolate, be patient and melt it in short intervals. Overheating can cause it to seize, leading to a grainy texture instead of that smooth, glossy finish you want.
-
Chill Between Layers: If you find that your chocolate layer is too soft to support the peanut butter filling, pop them in the fridge for a few minutes before adding the next layer. This step helps maintain distinct layers and improves overall structure.
-
Experiment with Fillings: Feel free to mix in some crushed nuts or a sprinkle of sea salt into the peanut butter mixture for added flavor and texture. It brings a delightful crunch and balances the sweetness.
-
Use Quality Cupcake Liners: Opt for sturdy liners that can hold their shape well when filled. This prevents any mess while serving and makes each cup easy to remove without tearing.
How to Serve Reese’s Peanut Butter Cups recipe
These homemade treats make wonderful gifts or party snacks! Presenting them beautifully can enhance their appeal even further.
Garnishes
- Chopped Peanuts: Sprinkle some chopped peanuts on top of the melted chocolate layer before refrigerating for an extra crunch.
- Drizzle of White Chocolate: After setting, drizzle some melted white chocolate over the tops for a beautiful contrast and an additional sweet twist.
- Sea Salt Flakes: A pinch of sea salt on top just before serving can elevate the flavor by balancing out the sweetness.
Side Dishes
-
Fruit Salad: A refreshing mix of seasonal fruits pairs wonderfully with these rich cups, balancing their sweetness with natural tartness.
-
Vanilla Ice Cream: Serve these cups alongside a scoop of creamy vanilla ice cream for an indulgent dessert experience that everyone will love.
-
Coffee or Tea: A warm cup of coffee or tea complements the flavors perfectly while providing a comforting end to any meal.
-
Chocolate-Covered Pretzels: For those who enjoy salty-sweet combinations, pairing these cups with chocolate-covered pretzels offers textural variety and delightfully contrasting flavors.
Enjoy making your own Reese’s Peanut Butter Cups, and don’t forget to share them with friends—they’ll be asking for seconds!
Make Ahead and Storage
This Reese’s Peanut Butter Cups recipe is perfect for meal prep, allowing you to whip up a batch in advance and enjoy these delightful treats whenever you crave something sweet.
Storing Leftovers
- Place any leftover peanut butter cups in an airtight container.
- Store them in the refrigerator for up to one week.
- For best flavor, allow them to come to room temperature before enjoying.
Freezing
- To freeze, individually wrap each peanut butter cup in plastic wrap.
- Place the wrapped cups in a freezer-safe bag or container.
- They can be frozen for up to three months. Thaw them in the refrigerator before serving.
Reheating
- If you prefer warm peanut butter cups, unwrap them and place them on a microwave-safe plate.
- Heat them in the microwave for 10-15 seconds until slightly warm but not melted.
FAQs
Here are some common questions about this delightful treat!
Can I use dark chocolate instead of milk chocolate for this Reese’s Peanut Butter Cups recipe?
Absolutely! Dark chocolate will give your peanut butter cups a rich flavor and pairs beautifully with the sweet peanut butter filling.
How can I make the Reese’s Peanut Butter Cups recipe healthier?
You can substitute natural peanut butter for regular peanut butter and choose sugar-free powdered sugar to reduce calories. Additionally, using dark chocolate can increase the health benefits.
Can I add toppings to my Reese’s Peanut Butter Cups?
Definitely! Consider adding crushed nuts, sea salt, or even drizzling caramel over the top for an extra layer of flavor.
What if I don’t have graham crackers?
If graham crackers aren’t available, you can use digestive biscuits or any plain cookie as a substitute; just crush them into fine crumbs.
How long does it take to prepare this Reese’s Peanut Butter Cups recipe?
The preparation time is quick—only about 15 minutes! With an additional 5 minutes for melting chocolate, you’ll have these delicious treats ready in no time.
Final Thoughts
I hope you’re as excited to make these delightful Reese’s Peanut Butter Cups as I am! They are not only simple but also bring joy with every bite. Enjoy sharing these treats with loved ones or keeping them all to yourself—they’re that good! Happy baking!
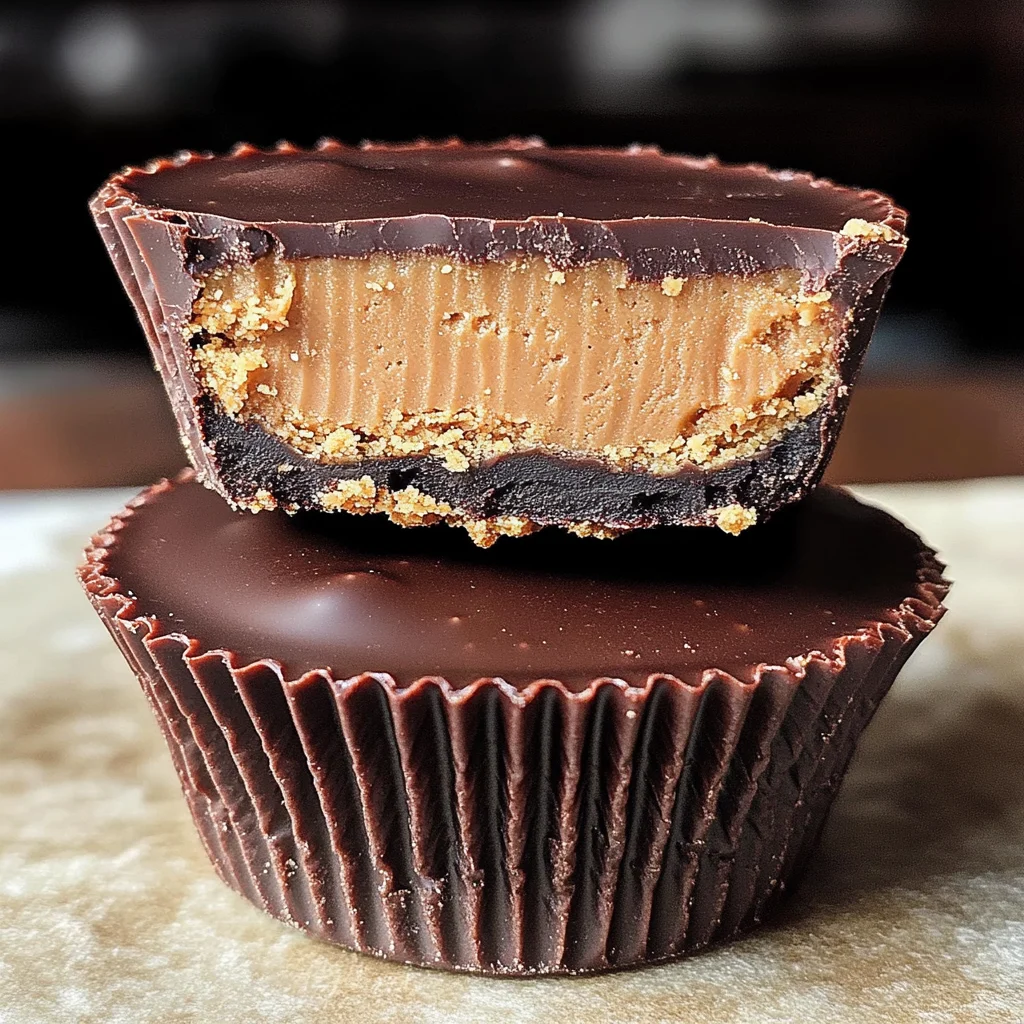
Reese’s Peanut Butter Cups
Indulge in the delightful taste of homemade Reese’s Peanut Butter Cups, a perfect blend of creamy peanut butter and rich chocolate. This easy recipe is a favorite for any occasion, whether you’re satisfying a sweet tooth or preparing treats for gatherings. With just a few simple ingredients and minimal prep time, you can create these delicious cups that are sure to please both kids and adults alike. Customize them with your favorite toppings or variations to make them truly yours. Enjoy the satisfaction of making this classic treat from scratch!
- Prep Time: 15 minutes
- Cook Time: 5 minutes
- Total Time: 20 minutes
- Yield: Makes approximately 15 cups 1x
- Category: Dessert
- Method: No-bake
- Cuisine: American
Ingredients
- 10 graham crackers
- 1¼ cups powdered sugar
- 1½ cups melted peanut butter
- 2 cups milk chocolate chips
Instructions
- Crush graham crackers into fine crumbs using a food processor.
- Combine crumbs with powdered sugar in a mixing bowl.
- Stir in melted peanut butter until well blended.
- Melt chocolate chips in short intervals until smooth.
- In cupcake liners, layer melted chocolate, peanut butter mixture, and top with more chocolate.
- Refrigerate for about an hour to set.
Nutrition
- Serving Size: 1 serving
- Calories: 160
- Sugar: 14g
- Sodium: 20mg
- Fat: 10g
- Saturated Fat: 3g
- Unsaturated Fat: 7g
- Trans Fat: 0g
- Carbohydrates: 15g
- Fiber: 1g
- Protein: 3g
- Cholesterol: 0mg