Easy Birds Nests Cookies Recipe
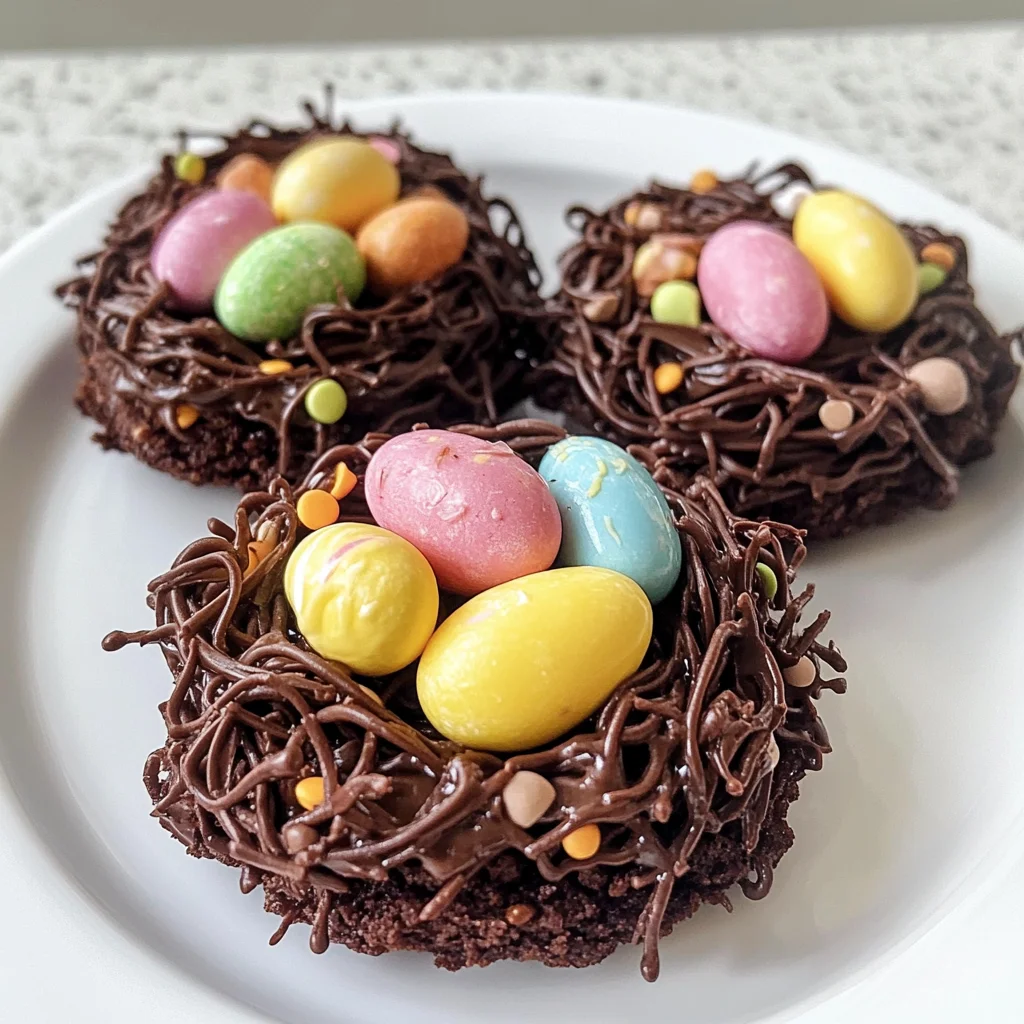
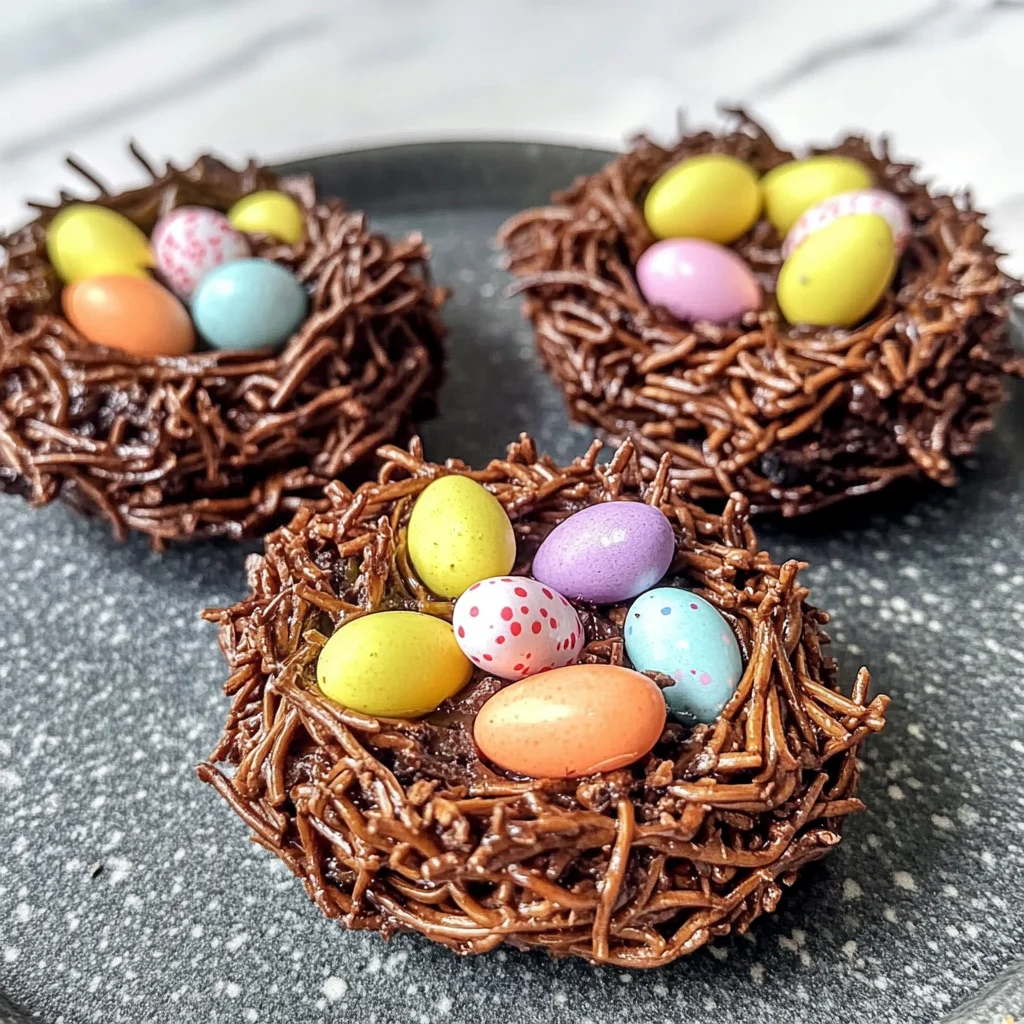
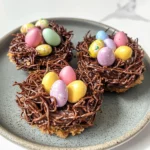
If you’re looking for a delightful treat that captures the spirit of spring, the Easy Birds Nests Cookies Recipe is just what you need! These charming cookies combine a soft chocolate base with crunchy, chocolate-coated chow mein noodles to create adorable nests. Each nest is lovingly filled with smooth chocolate and topped with pastel candy eggs, making them perfect for Easter gatherings or any festive occasion. I’ve always loved making these with my family; they bring so much joy and creativity to the kitchen.
These cookies are not just delicious—they’re also easy to make! Whether you’re baking for a celebration or simply want a fun weekend project, this recipe is a hit with both kids and adults. Plus, they look as good as they taste!
Why You’ll Love This Recipe
- Simple to prepare: With straightforward steps, you can whip up these treats in no time.
- Family-friendly fun: Get everyone involved in shaping the nests and adding the candy eggs!
- Perfect for any occasion: Ideal for Easter, spring parties, or whenever you want to sweeten someone’s day.
- Customizable toppings: You can use different candies or sprinkles to make each batch unique.
- Delicious flavor: The combination of rich chocolate and crunchy noodles creates a delightful texture that everyone loves.
Ingredients You’ll Need
Making these birds nest cookies requires just a few simple and wholesome ingredients. You might already have some of these in your pantry! Here’s what you’ll need:
For the Chocolate Cookie Base
- 1 cup (125g) all-purpose flour
- 1/4 cup (25g) cocoa powder
- 1/4 tsp salt
- 1/2 cup (115g) unsalted butter, softened
- 1/4 cup (50g) granulated sugar
- 1/4 cup (50g) brown sugar
- 1 tsp vanilla extract
- 1 large egg
For the Chocolate-Coated Chow Mein Nests
- 1 cup (120g) chow mein noodles
- 1 1/2 cups (250g) milk chocolate chips
- 1 tbsp coconut oil or vegetable shortening (optional)
For the Chocolate Filling
- 1/2 cup (100g) milk or dark chocolate chips
- 1 tsp coconut oil or butter (optional)
For the Topping
- Pastel candy eggs (2–4 per cookie, depending on size)
- Optional: Colorful sprinkles or nonpareils
Variations
This recipe is wonderfully flexible! Here are some ideas to customize your birds nests:
- Try different chocolates: Use white chocolate or dark chocolate for a different flavor profile.
- Add nuts: Sprinkle in some chopped nuts for an extra crunch.
- Change the candies: Use mini marshmallows, jelly beans, or other seasonal candies instead of pastel eggs.
- Make it gluten-free: Substitute all-purpose flour with a gluten-free blend for a safe option for those with dietary restrictions.
How to Make Easy Birds Nests Cookies Recipe
Step 1: Make the Chocolate Cookie Base
Preheat your oven to 350°F (175°C) and line a baking sheet with parchment paper. In one bowl, whisk together the flour, cocoa powder, and salt. In another larger bowl, beat the softened butter along with granulated and brown sugar until light and fluffy. Adding vanilla extract and an egg will help create that rich flavor. Finally, gradually mix in your dry ingredients until a soft dough forms. Flatten about 1 tablespoon of dough into disks on your baking sheet and bake them for 8-10 minutes until set at the edges. Let them cool completely before moving on.
Step 2: Choose Your Nest Style
You have two fun options here—classic chocolate-coated noodle nests or piped chocolate nests! Decide which style you’d like to create; both are equally delightful.
Step 3: Option 1 – Chocolate-Coated Noodle Nests
Microwave your milk chocolate chips in increments of 30 seconds until smooth. If needed, add coconut oil or shortening to thin out the mixture. Toss your chow mein noodles into a large bowl with melted chocolate until they’re fully coated. This step is key because it gives your nests their signature look!
Step 4: Assemble the Nests
Scoop about 2 tablespoons of those deliciously coated noodles onto each cooled cookie base. Shape them into circular nests with a hollow center to hold your filling later on. Let them sit at room temperature for about 15 minutes so they firm up slightly.
Step 5: Fill the Nests with Chocolate
In another bowl, melt your milk or dark chocolate chips again using the microwave method. Mixing in coconut oil or butter will give it that silky texture we love! Spoon this melted goodness into each nest’s center until it’s about halfway full. Gently tap each cookie down on the counter to smooth out that luscious filling.
Step 6: Option 2 – Piped Chocolate Nests
For those who choose this style, melt your chocolate similarly as before. Transfer it into a piping bag fitted with a small round tip—or use a zip-top bag if that’s easier! Pipe circular motions starting from the center of each cooled cookie to create raised nests.
Step 7: Add the Candy Eggs
Once everything has set nicely and cooled down, gently press in those pastel candy eggs into each nest’s center—about 2-4 per cookie works well! Feel free to add colorful sprinkles around as an extra touch of festivity!
Now you’re all set! Serve these lovely birds nest cookies at gatherings or enjoy them during quiet moments at home—they’re sure to bring smiles all around!
Pro Tips for Making Easy Birds Nests Cookies Recipe
Creating these delightful cookies is a breeze, but a few handy tips can elevate your baking game!
-
Use room temperature ingredients: Ensuring your butter and egg are at room temperature helps create a smoother dough that mixes more easily, resulting in a fluffier cookie base.
-
Be gentle with the noodles: When coating the chow mein noodles with chocolate, toss them gently to avoid breaking them. This keeps the nests intact and provides that charming texture.
-
Chill for perfection: After filling the nests with chocolate, refrigerate them briefly. This not only speeds up the setting time but also ensures that the chocolate filling firms up nicely, allowing for easy handling.
-
Customize your toppings: Don’t hesitate to get creative with your pastel candy eggs! You can mix different colors or shapes to give each nest a unique look, making them even more fun for gatherings.
-
Double the recipe: If you’re planning to share (or just want more deliciousness at home), consider doubling the recipe. These treats are always a hit and perfect for any occasion!
How to Serve Easy Birds Nests Cookies Recipe
Presenting your Easy Birds Nests Cookies in an appealing way can make all the difference when showcasing your culinary creations. Here are some fun ideas to make them stand out!
Garnishes
- Fresh mint leaves: A few sprigs of mint not only add a pop of color but also provide a refreshing contrast to the sweetness of the cookies.
- Shredded coconut: Lightly toasted shredded coconut sprinkled around the nests mimics grass and enhances the springtime vibe.
Side Dishes
- Fruit salad: A bright mix of seasonal fruits adds freshness to your dessert table and complements the rich flavors of the cookies beautifully.
- Yogurt parfaits: Layering yogurt with granola and berries creates a light yet satisfying option that balances out the sweetness of your cookies.
- Cheese platter: A selection of mild cheeses can offer a savory contrast to these sweet treats, making for an enjoyable dessert experience.
- Iced tea or lemonade: Refreshing beverages like iced tea or lemonade will perfectly complement these cookies while keeping everyone cool during festive gatherings.
Enjoy making and sharing these delightful Easter birds nest cookies! They’re sure to bring smiles and joy to anyone who tries them. Happy baking!
Make Ahead and Storage
These delightful Easy Birds Nests Cookies are perfect for meal prep, making them an ideal treat to enjoy throughout the week or to gift during the spring season.
Storing Leftovers
- Store the cookies in an airtight container at room temperature for up to 3 days.
- If you have leftover chocolate filling, keep it separate in a small container in the refrigerator for up to a week.
Freezing
- To freeze, place the cooled cookies in a single layer on a baking sheet and freeze until solid.
- Once frozen, transfer the cookies to a freezer-safe container or bag. They can be stored for up to 1 month.
- Thaw at room temperature before serving or enjoy them straight from the freezer for a cool treat!
Reheating
- If desired, you can reheat the cookies in the microwave for about 10-15 seconds to soften them.
- Avoid overheating, as this may melt the chocolate filling.
FAQs
I’m sure you’re curious about these charming treats! Here are some frequently asked questions:
Can I make these Easy Birds Nests Cookies Recipe gluten-free?
Absolutely! You can substitute all-purpose flour with a gluten-free flour blend. Just be sure to check that your other ingredients are also gluten-free.
What can I use instead of chow mein noodles in the Easy Birds Nests Cookies Recipe?
If you can’t find chow mein noodles, consider using pretzel sticks or even shredded wheat as a crunchy alternative. Both will create a lovely nest effect!
How long do these cookies last?
When properly stored in an airtight container, these cookies can last up to 3 days at room temperature, or you can freeze them for up to 1 month.
Can I use dark chocolate instead of milk chocolate?
Yes! You can easily substitute dark chocolate chips for milk chocolate chips in this recipe. It will give your nests a richer flavor!
Final Thoughts
I hope you feel inspired to whip up these adorable Easy Birds Nests Cookies! They’re not just delicious but also bring a touch of whimsy to any gathering. Enjoy making them with family and friends—it’s such a joy to see everyone’s creative take on decorating their nests. Happy baking, and may your spring celebrations be filled with sweetness!
Easy Birds Nests Cookies
Create fun and festive treats with this Easy Birds Nests Cookies Recipe. Perfect for spring celebrations—try it today!
- Prep Time: 15 minutes
- Cook Time: 10 minutes
- Total Time: 25 minutes
- Yield: Approximately 12 cookies 1x
- Category: Dessert
- Method: Baking
- Cuisine: American
Ingredients
- 1 cup all-purpose flour
- 1/4 cup cocoa powder
- 1/4 tsp salt
- 1/2 cup unsalted butter, softened
- 1/4 cup granulated sugar
- 1/4 cup brown sugar
- 1 tsp vanilla extract
- 1 large egg
- 1 cup chow mein noodles
- 1 1/2 cups milk chocolate chips
- 1 tbsp coconut oil or vegetable shortening (optional)
- 1/2 cup milk or dark chocolate chips
- 1 tsp coconut oil or butter (optional)
- Pastel candy eggs (2–4 per cookie, depending on size)
- Colorful sprinkles or nonpareils (optional)
Instructions
- Preheat oven to 350°F (175°C) and line a baking sheet with parchment paper.
- In one bowl, whisk together the flour, cocoa powder, and salt. In another larger bowl, beat the softened butter along with granulated and brown sugar until light and fluffy. Add vanilla extract and an egg; mix in dry ingredients until a soft dough forms.
- Flatten about 1 tablespoon of dough into disks on your baking sheet and bake them for 8-10 minutes until set at the edges. Let them cool completely.
- Microwave milk chocolate chips in increments of 30 seconds until smooth. If needed, add coconut oil or shortening to thin out the mixture. Toss chow mein noodles into a large bowl with melted chocolate until fully coated.
- Scoop about 2 tablespoons of coated noodles onto each cooled cookie base and shape them into circular nests with a hollow center.
- In another bowl, melt milk or dark chocolate chips again. Mix in coconut oil or butter and spoon this melted chocolate into each nest's center until about halfway full.
- Once everything has set and cooled, gently press in pastel candy eggs into each nest's center.
Nutrition
- Serving Size: 1 cookie (30g)
- Calories: 151
- Sugar: 8g
- Sodium: 36mg
- Fat: 7g
- Saturated Fat: 4g
- Unsaturated Fat: 3g
- Trans Fat: 0g
- Carbohydrates: 21g
- Fiber: 1g
- Protein: 2g
- Cholesterol: 15mg