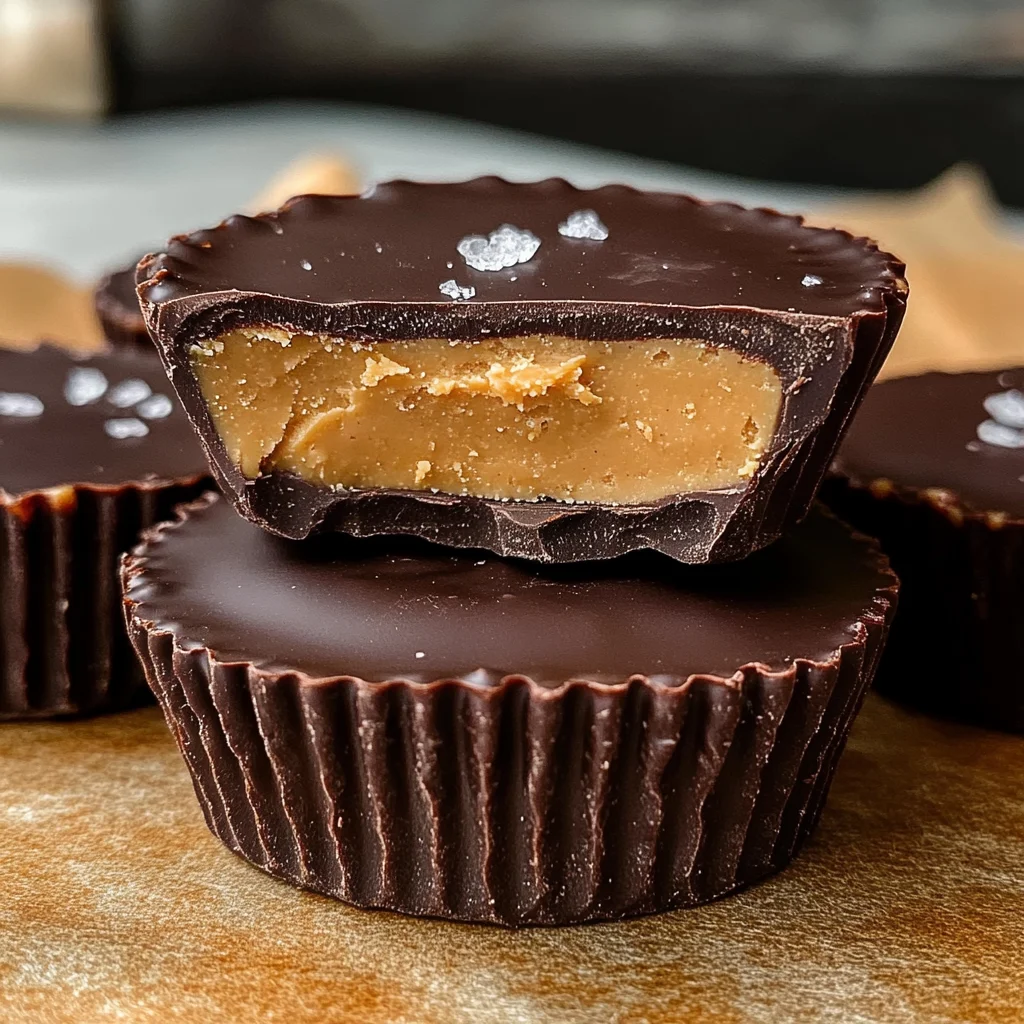
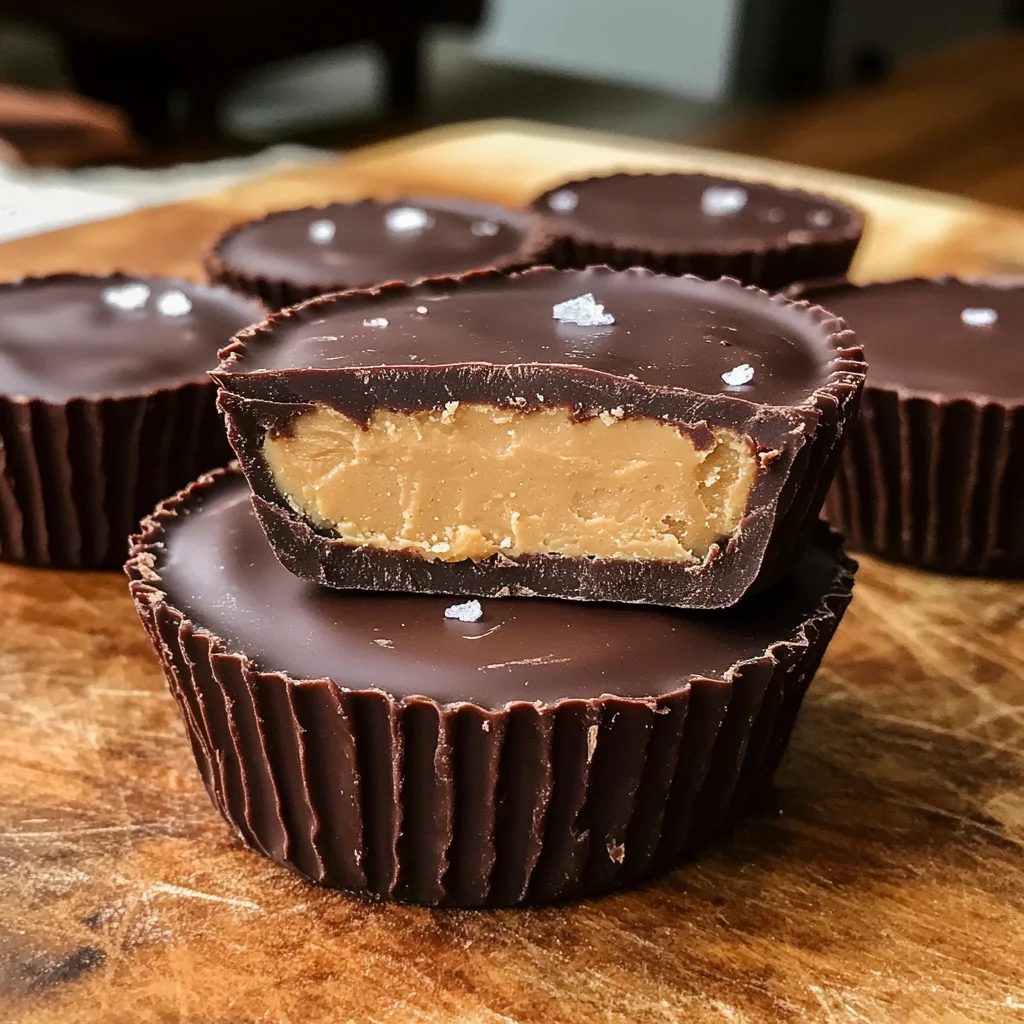
Homemade Reese’s Cups Recipe
If you’re looking for a treat that combines nostalgia with pure deliciousness, then this Homemade Reese’s Cups Recipe is just what you need! There’s something magical about the creamy peanut butter nestled between layers of rich chocolate. It transports me back to my childhood, where every bite felt like a special occasion. This recipe is not only fun to make but also perfect for those busy weeknights or family gatherings when you want to impress without spending hours in the kitchen.
These homemade delights are sure to become a favorite in your home, too. Whether you’re making them for a party, gifting them to friends, or just indulging yourself after a long day, they always hit the spot!
Why You’ll Love This Recipe
- Easy to Make: With simple steps and straightforward ingredients, you’ll whip these up in no time.
- Family-Friendly: Everyone loves peanut butter cups! They’re a hit with kids and adults alike.
- Make Ahead: Perfect for meal prep! You can make a batch ahead of time and store them for later cravings.
- Customizable: This recipe invites creativity—feel free to add your own twist!
- Deliciously Satisfying: The rich combination of chocolate and peanut butter will have your taste buds dancing.
Ingredients You’ll Need
Making these homemade Reese’s cups is as easy as gathering some simple, wholesome ingredients you probably already have in your pantry. Here’s what you’ll need:
For the Chocolate Base
- 14 ounces semi-sweet chocolate chips, divided in half
For the Peanut Butter Filling
- 1 cup creamy peanut butter
- 6 tablespoons powdered sugar
- 4 tablespoons butter, softened
Variations
One of the best things about this Homemade Reese’s Cups Recipe is its flexibility! Feel free to get creative and make these treats your own:
- Add Crunch: Mix in some crushed pretzels or nuts into the peanut butter filling for an extra crunch.
- Flavor Boost: Add a touch of vanilla extract or even a pinch of cinnamon to the peanut butter mixture for added flavor.
- Dark Chocolate Delight: Try using dark chocolate chips instead of semi-sweet for a richer taste.
- Mini Cups: Use mini cupcake liners for bite-sized versions that are perfect for parties!
How to Make Homemade Reese’s Cups Recipe
Step 1: Melt the Chocolate
Start by melting half of the chocolate chips in a microwave-safe bowl. Do this in 30-second intervals, stirring each time until smooth. Melting chocolate slowly helps prevent burning and ensures it stays silky.
Step 2: Create the Chocolate Base
Spoon about ½ tablespoon of melted chocolate into each cupcake liner. Gently shake the muffin tin to spread the chocolate evenly across the bottom. This step creates a solid base that will hold all that delicious filling!
Step 3: Freeze Until Set
Place the muffin tin in the freezer for about 15 minutes until set. Freezing allows the chocolate to harden quickly, ensuring each cup has a firm foundation.
Step 4: Prepare the Peanut Butter Filling
While waiting, combine the peanut butter, powdered sugar, and softened butter in a mixing bowl. Beat them together until smooth and creamy. This mixture is where all that delightful flavor comes from!
Step 5: Add the Filling
Spoon 1 tablespoon of this luscious peanut butter mixture onto each hardened chocolate base, making sure it’s centered perfectly. This layer is what makes these cups so irresistible!
Step 6: Quick Freeze Again
Pop them back into the freezer for another 5 minutes. This quick chill helps firm up your filling before adding more chocolate on top.
Step 7: Top with More Chocolate
Melt the remaining chocolate chips just like before. Spoon it over each peanut butter layer to cover completely. This final layer seals everything in, providing that classic Reese’s cup experience.
Step 8: Final Chill Time
Freeze again for about 10 to 15 minutes or refrigerate for 15 to 20 minutes until fully set. Patience here pays off—allowing everything to chill properly means clean lines when you unwrap them later!
Step 9: Serve and Enjoy!
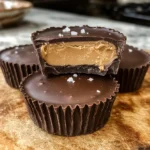
Once set, carefully peel off the cupcake liners and arrange your homemade cups on a platter. For an extra touch of deliciousness, sprinkle some sea salt on top before serving. Then sit back and watch as everyone enjoys their new favorite treat!
Pro Tips for Making Homemade Reese’s Cups Recipe
Making homemade Reese’s cups can be a delightful experience, and with these handy tips, you’ll be well on your way to creating the perfect treat!
-
Use quality chocolate – Opting for high-quality semi-sweet chocolate chips not only enhances the flavor but also ensures a smooth melting process that results in a creamier texture.
-
Avoid overmixing the peanut butter filling – Mixing just until combined helps maintain the creamy texture of peanut butter, giving your cups that perfect bite without being overly dense.
-
Chill between layers – Freezing the chocolate and peanut butter layers separately allows each layer to set properly, preventing them from mixing together and ensuring distinct flavors in every bite.
-
Experiment with fillings – For a fun twist, try adding crushed nuts or a sprinkle of sea salt in between the layers to customize your Reese’s cups to your taste preferences!
-
Store properly – Keep your homemade cups in an airtight container in the refrigerator. This not only prolongs their freshness but also makes them easy to grab whenever you need a sweet fix!
How to Serve Homemade Reese’s Cups Recipe
Presenting your homemade Reese’s cups can turn this simple dessert into an eye-catching delight! Here are some fun ideas to serve and enjoy them.
Garnishes
- Sea salt sprinkle – A light dusting of flaky sea salt enhances the flavor profile, balancing the sweetness of the chocolate and peanut butter beautifully.
- Drizzle of chocolate or white chocolate – A drizzle on top adds an elegant touch and extra sweetness; use melted chocolate or white chocolate for contrasting colors.
Side Dishes
-
Fresh fruit platter – Pair these treats with a fresh fruit platter featuring strawberries, apple slices, or banana halves. The natural sweetness of fruit complements the rich flavors of the Reese’s cups.
-
Vanilla ice cream – A scoop of creamy vanilla ice cream can be a fantastic accompaniment, providing a cool contrast to the rich flavors of the candy while making for an indulgent dessert experience.
-
Coffee or herbal tea – Serve alongside a warm cup of coffee or herbal tea like chamomile or peppermint. The warmth balances out the richness of the dessert and makes for a cozy after-dinner treat.
-
Nut mix or trail mix – A handful of mixed nuts or trail mix can provide a crunchy texture contrast to your Reese’s cups. This savory-sweet combo is sure to please!
Now you’re ready to whip up some delicious homemade Reese’s cups that are sure to impress everyone at your next gathering! Enjoy every moment of making and sharing these delightful treats.
Make Ahead and Storage
This Homemade Reese’s Cups Recipe is perfect for meal prep, allowing you to indulge in these delightful treats whenever a craving strikes. With simple storing and freezing techniques, you can enjoy them fresh or keep them handy for later.
Storing Leftovers
- Store any leftover peanut butter cups in an airtight container.
- Keep them in the refrigerator for up to one week.
- For longer freshness, consider freezing them.
Freezing
- Once the cups are fully set, place them in a single layer on a baking sheet and freeze until solid.
- Transfer the frozen cups to an airtight container or freezer bag.
- They can be stored in the freezer for up to three months.
Reheating
- To enjoy your frozen cups, simply take them out of the freezer and let them sit at room temperature for about 10-15 minutes.
- Avoid microwaving to maintain their texture and flavor.
FAQs
Here are some common questions about this delicious recipe:
Can I make these homemade Reese’s cups with dark chocolate?
Absolutely! Feel free to swap semi-sweet chocolate chips with dark chocolate chips for a richer taste.
How long do homemade Reese’s cups last?
If properly stored in the fridge, your homemade Reese’s cups will last about a week. For longer storage, you can freeze them for up to three months.
Can I use crunchy peanut butter instead?
Yes! Using crunchy peanut butter will add a delightful texture contrast to your Homemade Reese’s Cups Recipe. Just ensure it’s well-mixed before adding it to the filling.
What can I use instead of powdered sugar?
You can substitute powdered sugar with coconut sugar or a sugar-free alternative if desired. Just ensure it’s finely ground for a smooth filling!
Final Thoughts
I hope you enjoy making this Homemade Reese’s Cups Recipe as much as I do! It’s such a fun and rewarding treat that brings a little sweetness into everyday moments. Don’t hesitate to get creative—maybe even involve the kids in the kitchen! Enjoy every bite, and remember that cooking is all about love and sharing deliciousness with those around you. Happy baking!
Homemade Reese’s Cups
If you’re craving a sweet treat that’s both nostalgic and delicious, this Homemade Reese’s Cups Recipe is the perfect solution! These delightful cups feature a creamy peanut butter filling sandwiched between rich layers of chocolate, delivering a satisfying indulgence with every bite. Not only are they easy to make, but they’re also customizable, allowing you to add your favorite flavors or textures. Whether it’s for a family gathering, a special gift, or simply to enjoy after a long day, these homemade delights are sure to become a staple in your kitchen.
- Prep Time: 20 minutes
- Cook Time: 0 minutes
- Total Time: 20 minutes
- Yield: Approximately 12 cups 1x
- Category: Dessert
- Method: No-bake
- Cuisine: American
Ingredients
- 14 ounces semi-sweet chocolate chips
- 1 cup creamy peanut butter
- 6 tablespoons powdered sugar
- 4 tablespoons softened butter
Instructions
- Melt half of the chocolate chips in a microwave-safe bowl using 30-second intervals until smooth.
- Spoon about ½ tablespoon of melted chocolate into each cupcake liner and shake gently to spread evenly.
- Freeze the muffin tin for about 15 minutes until the chocolate is set.
- In a mixing bowl, combine peanut butter, powdered sugar, and softened butter; beat until smooth.
- Spoon 1 tablespoon of the peanut butter mixture onto each hardened chocolate base.
- Freeze for another 5 minutes to firm up.
- Melt the remaining chocolate chips and cover the peanut butter layer completely.
- Freeze again for 10-15 minutes until fully set before serving.
Nutrition
- Serving Size: 1 serving
- Calories: 200
- Sugar: 10g
- Sodium: 50mg
- Fat: 13g
- Saturated Fat: 5g
- Unsaturated Fat: 7g
- Trans Fat: 0g
- Carbohydrates: 18g
- Fiber: 2g
- Protein: 5g
- Cholesterol: 10mg