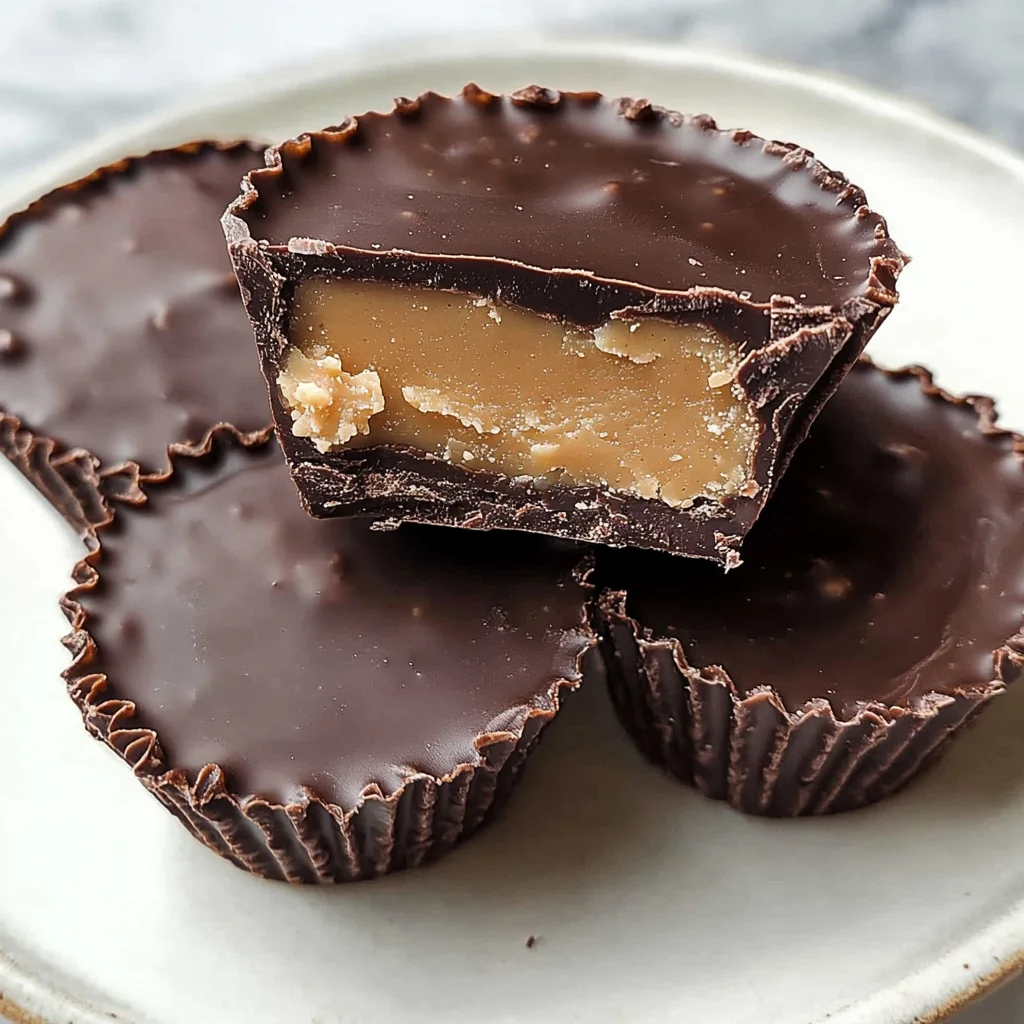
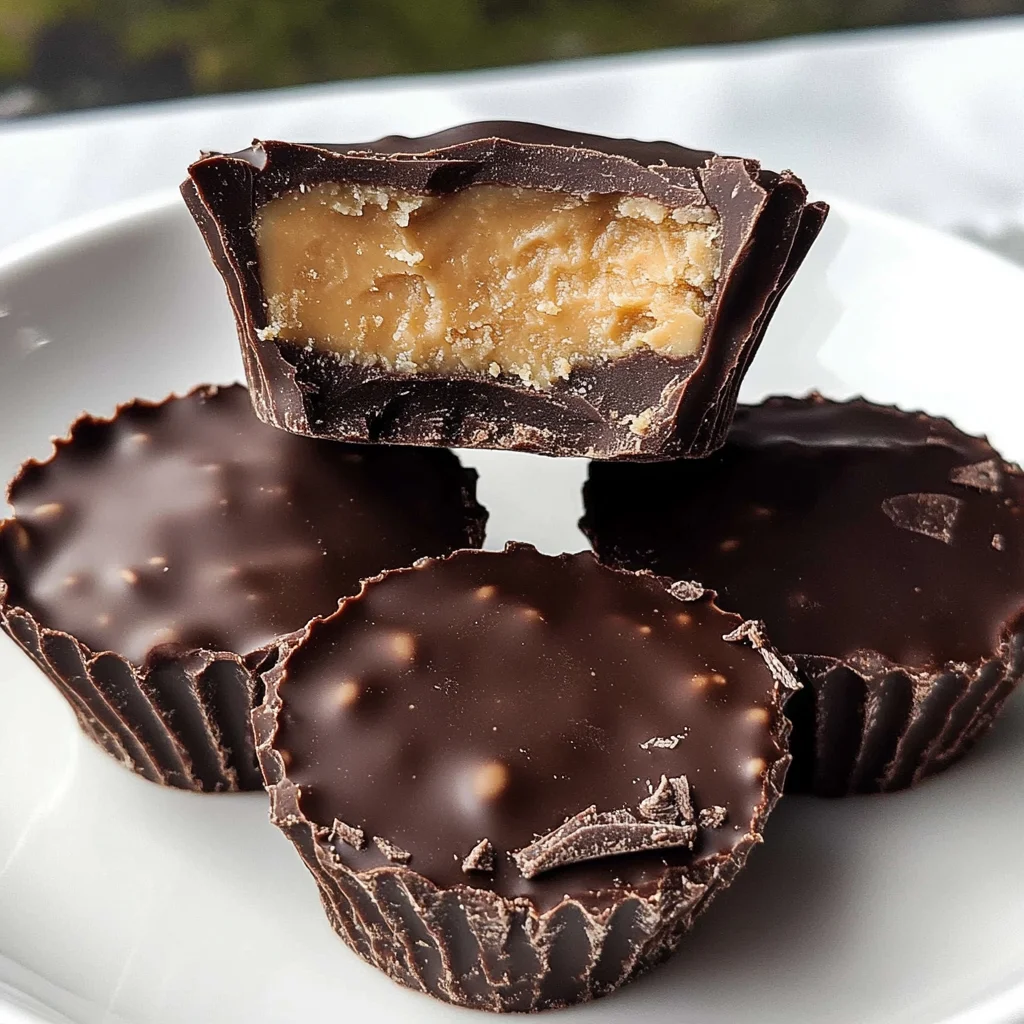
Homemade Reese’s Peanut Butter Cups
If you’re looking for a delightful treat that brings back childhood memories, look no further than these Homemade Reese’s Peanut Butter Cups. There’s something incredibly satisfying about biting into the creamy, dreamy peanut butter center surrounded by rich chocolate. It’s a recipe I hold dear to my heart because it’s not just a dessert; it’s a little piece of happiness that can brighten any day. Perfect for family gatherings, cozy movie nights, or just because you deserve a sweet moment, these cups are sure to impress.
This recipe is so easy that even the kids can join in on the fun! With just a few simple ingredients, you’ll have your own batch of homemade peanut butter cups ready to enjoy in no time.
Why You’ll Love This Recipe
- Quick and Easy: You can whip these up in just 35 minutes, making them perfect for those last-minute cravings.
- Family-Friendly Fun: Get the kids involved! They’ll love mixing and pouring their way to deliciousness.
- Make-Ahead Treats: These peanut butter cups store well, so you can make them ahead of time for parties or snacks.
- Customizable: Feel free to get creative with flavors and toppings—there’s no wrong way to enjoy them!
- Pure Indulgence: With that creamy peanut butter and rich chocolate combo, every bite is pure bliss!
Ingredients You’ll Need
To create your own Homemade Reese’s Peanut Butter Cups, you’ll need some wholesome ingredients that are both simple and delicious. Here’s what you’ll gather:
For the Peanut Butter Filling
- 1 cup creamy peanut butter
- 1/4 cup powdered sugar
- 1/2 teaspoon vanilla extract
For the Chocolate Shell
- 1 1/2 cups chocolate chips
- Cupcake liners or silicone molds
Optional Topping
- 1/4 cup chopped peanuts
Variations
One of the best parts about making Homemade Reese’s Peanut Butter Cups is how flexible this recipe can be. You can easily customize it to suit your taste or dietary preferences. Here are some fun variations to try:
- Swap the Nut Butter: Use almond or cashew butter for a different flavor profile.
- Add Some Crunch: Mix in some crispy rice cereal into the peanut butter filling for added texture.
- Go Darker: Try dark chocolate chips instead of milk chocolate for a richer taste.
- Flavor Infusion: Add a pinch of sea salt or a dash of cinnamon to the peanut butter filling for an extra kick.
How to Make Homemade Reese’s Peanut Butter Cups
Step 1: Prepare the Peanut Butter Filling
In a bowl, mix together the creamy peanut butter, powdered sugar, and vanilla extract. Stir until everything is combined and smooth. This step is key because it creates that luscious filling we all love—sweet yet savory!
Step 2: Melt the Chocolate
Next, melt your chocolate chips. You can do this in a microwave-safe bowl or use a double boiler if you prefer. Stir gently until fully melted. This melted chocolate will form both the bottom and top layers of your peanut butter cups, so take your time making sure it’s nice and smooth.
Step 3: Line Your Molds
Now it’s time to line your muffin tin with cupcake liners, or use silicone molds. This makes it easy to pop out your delicious treats once they’re set. Plus, who doesn’t love colorful cupcake liners?
Step 4: Create the Chocolate Base
Pour a small amount of melted chocolate into each liner, ensuring you cover the bottom completely. This step creates a solid foundation for our filling—don’t skimp on this layer!
Step 5: Add the Peanut Butter Layer
Spoon in some of your peanut butter mixture on top of the chocolate base. Make sure it’s evenly distributed among all liners. This creamy layer is where all the magic happens—it’s what makes these cups taste just like their store-bought counterparts!
Step 6: Top It Off with More Chocolate
Pour more melted chocolate over each filled liner until they are covered completely. This final layer seals in all that deliciousness. If you’re feeling adventurous, sprinkle some chopped peanuts on top before they set!
Step 7: Chill Out!
Refrigerate your creations for about 30 minutes or until the chocolate has hardened completely. Patience is key here—this wait will lead to sweet satisfaction!
Step 8: Enjoy!
Once firm, gently remove each cup from its liner and enjoy your Homemade Reese’s Peanut Butter Cups! Share them with friends or keep them all to yourself; I won’t judge!
There you have it—a delightful treat that’s as fun to make as it is to eat! Enjoy every bite!
Pro Tips for Making Homemade Reese’s Peanut Butter Cups
Making your own peanut butter cups can be a delightful experience, and these tips will help you achieve the best results!
-
Use high-quality chocolate: Choosing premium chocolate chips ensures a richer flavor and smoother texture. Good chocolate makes all the difference in achieving that luscious shell.
-
Chill the peanut butter mixture: Before layering it into the chocolate, refrigerate the peanut butter mix for about 10 minutes. This helps it firm up slightly, making it easier to layer without mixing into the chocolate.
-
Don’t rush the melting process: Whether using a microwave or a double boiler, melt chocolate slowly and stir frequently. This prevents burning and helps achieve a glossy finish.
-
Experiment with nut butters: While creamy peanut butter is classic, feel free to try almond or cashew butter for a different twist! These alternatives can give your cups unique flavors while keeping them deliciously creamy.
-
Store properly: To keep your homemade treats fresh, store them in an airtight container in the refrigerator. They can last up to two weeks—if they last that long!
How to Serve Homemade Reese’s Peanut Butter Cups
Presenting your homemade peanut butter cups can be just as fun as making them! Here are some creative ideas to serve these delightful treats.
Garnishes
-
Drizzle of melted chocolate: A simple drizzle of additional melted chocolate over the top adds elegance and extra flavor.
-
Sea salt sprinkle: A light sprinkle of flaky sea salt enhances the sweetness and brings out the rich flavors of both chocolate and peanut butter.
Side Dishes
-
Fresh fruit salad: A refreshing fruit salad with berries, melons, and citrus complements the sweetness of the peanut butter cups while adding a healthy element to your dessert spread.
-
Vanilla coconut yogurt: Serving these treats alongside a dollop of coconut yogurt adds creaminess and balances the richness of the cups with its tangy flavor.
-
Homemade graham crackers: Crunchy graham crackers make an excellent pairing, bringing in a delightful texture contrast to your sweet treats. Plus, they make for great dipping!
With these serving suggestions and pro tips in mind, you’re all set to impress friends and family with your delicious homemade Reese’s Peanut Butter Cups! Enjoy every bite!
Make Ahead and Storage
This Homemade Reese’s Peanut Butter Cups recipe is perfect for meal prep! You can whip up a batch ahead of time and store them for those sweet cravings later. Here’s how to keep your delightful treats fresh.
Storing Leftovers
- Place any uneaten peanut butter cups in an airtight container.
- Store them in the refrigerator for up to one week.
- Keep them away from strong-smelling foods to prevent flavor transfer.
Freezing
- Wrap each peanut butter cup individually in plastic wrap or aluminum foil.
- Place wrapped cups in a freezer-safe bag or container.
- They can be frozen for up to three months—perfect for long-term storage!
Reheating
- To enjoy your peanut butter cups again, simply let them thaw at room temperature for about 15 minutes.
- If you prefer them slightly warm, you can microwave a cup on low power for about 10-15 seconds, but be careful not to melt the chocolate too much.
FAQs
Here are some common questions about making Homemade Reese’s Peanut Butter Cups.
Can I use natural peanut butter for Homemade Reese’s Peanut Butter Cups?
Absolutely! Natural peanut butter works great, but it may be a bit runnier than creamy varieties. Be sure to mix it well with powdered sugar for stability.
How do I make Homemade Reese’s Peanut Butter Cups without chocolate chips?
You can melt your favorite dairy-free chocolate bars instead of using chocolate chips. Just chop the bar and follow the same melting instructions.
How long do Homemade Reese’s Peanut Butter Cups last?
When stored properly in the refrigerator, these delicious treats will stay fresh for up to one week. If frozen, they can last up to three months!
Can I add different toppings to my Homemade Reese’s Peanut Butter Cups?
Definitely! Feel free to get creative with toppings like sea salt, crushed pretzels, or even drizzles of caramel sauce before the chocolate sets.
Are these Homemade Reese’s Peanut Butter Cups suitable for kids?
Yes! Kids love these sweet treats. Just ensure that all ingredients meet their dietary preferences and restrictions!
Final Thoughts
I hope you enjoy making these delicious Homemade Reese’s Peanut Butter Cups as much as I do! They’re not only easy to prepare but also bring a smile with every bite. Perfect for sharing (or keeping all to yourself!), this recipe is a delightful treat that everyone will love. Happy cooking, and don’t forget to try out this simple yet satisfying dessert!
Homemade Reese’s Peanut Butter Cups
Indulge in the nostalgia of childhood with these Homemade Reese’s Peanut Butter Cups. With a creamy peanut butter filling enveloped in rich chocolate, this delightful treat is not just a dessert—it’s a little piece of happiness you can make at home! Perfect for family gatherings, cozy movie nights, or just satisfying your sweet tooth, these no-bake cups are quick and easy to prepare. In just 35 minutes, you can whip up a batch that will impress both kids and adults alike. Customize them with different nut butters or toppings for an extra twist. Enjoy every blissful bite of this classic candy remake, made easily and healthily right in your kitchen!
- Prep Time: 15 minutes
- Cook Time: 20 minutes
- Total Time: 35 minutes
- Yield: Makes approximately 12 servings 1x
- Category: Dessert
- Method: No-bake
- Cuisine: American
Ingredients
- 1 cup creamy peanut butter
- 1/4 cup powdered sugar
- 1/2 teaspoon vanilla extract
- 1 1/2 cups chocolate chips
- Cupcake liners or silicone molds
- Optional: 1/4 cup chopped peanuts
Instructions
- In a bowl, combine the peanut butter, powdered sugar, and vanilla extract until smooth.
- Melt the chocolate chips in a microwave-safe bowl or double boiler until fully melted.
- Line your muffin tin with cupcake liners or use silicone molds.
- Pour a small amount of melted chocolate into each liner to create the base layer.
- Spoon the peanut butter mixture over the chocolate base evenly.
- Top with more melted chocolate until completely covered.
- Refrigerate for about 30 minutes until set.
- Remove from liners and enjoy!
Nutrition
- Serving Size: 1 cup (32g)
- Calories: 130
- Sugar: 9g
- Sodium: 45mg
- Fat: 9g
- Saturated Fat: 3g
- Unsaturated Fat: 5g
- Trans Fat: 0g
- Carbohydrates: 12g
- Fiber: 1g
- Protein: 3g
- Cholesterol: 0mg