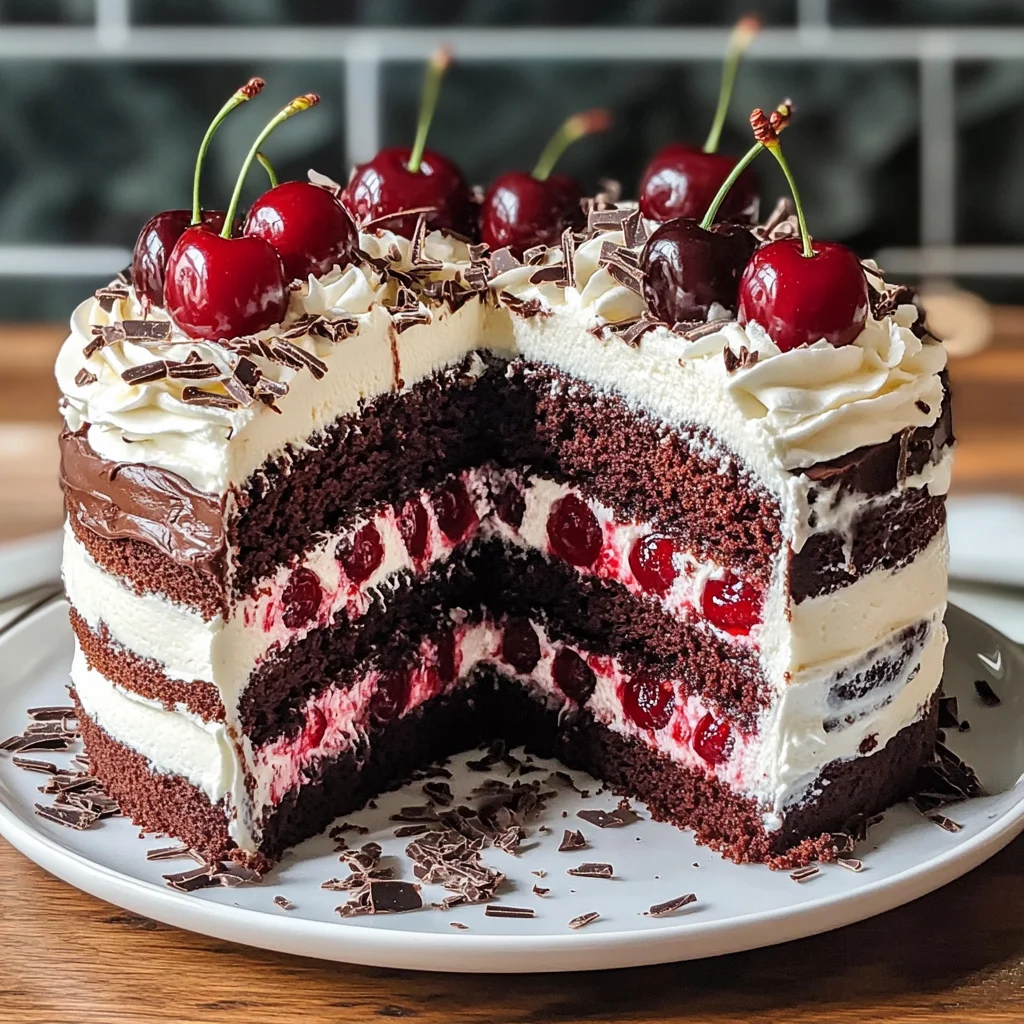
Black Forest Cake
If you’re looking for a show-stopping dessert that combines rich chocolate and tart cherries, then this Black Forest Cake recipe is just for you! This cake has been a cherished part of my family gatherings for years. Every layer is a delightful surprise, with fluffy chocolate cake, a luscious cherry filling, and creamy vanilla whipped topping. It’s perfect for birthdays, holidays, or simply when you want to treat yourself (because who doesn’t deserve a slice of happiness?).
Whether it’s a busy weeknight or a festive occasion, this cake brings everyone together. When I serve it, the smiles and happy sighs around the table are priceless. Plus, making it from scratch means you can customize every bite!
Why You’ll Love This Recipe
- Easy to make: With simple steps and straightforward ingredients, anyone can whip up this delightful cake!
- Family favorite: The combination of chocolate and cherries is sure to be loved by both kids and adults alike.
- Perfect for any occasion: Whether it’s a birthday party or a cozy dinner at home, this cake fits right in.
- Make-ahead friendly: You can bake the cakes ahead of time and assemble them later—perfect for planning!
- Decadent flavor: Each bite bursts with rich chocolate complemented by sweet-tart cherries.
Ingredients You’ll Need
Let’s gather our simple and wholesome ingredients that will come together to create this delicious Black Forest Cake. Trust me; each one plays an important role in crafting the perfect balance of flavors!
For the Cake
- 1 3/4 cups all purpose flour
- 3/4 cup dutch processed cocoa powder
- 1 1/2 teaspoons baking powder
- 1 teaspoon baking soda
- 1/2 teaspoon salt
- 1 1/2 cups buttermilk
- 1 teaspoon vanilla extract
- 1 teaspoon instant coffee granules (optional)
- 3/4 cup vegetable oil (canola oil)
- 2 cups granulated sugar
- 2 large eggs
- 1 large egg white
For the Cherry Filling
- 1/2 cup granulated sugar
- 2 1/2 tablespoons cornstarch
- 2 cups tart cherries (frozen or canned, drained) + extra for garnish if not using fresh
- 1 tablespoon butter
- 1/4 teaspoon almond extract
For the Whipped Cream
- 6 tablespoons chocolate syrup (divided)
- 1 1/2 cups heavy whipping cream
- 1/4 cup powdered sugar
- 2 teaspoons vanilla extract
For Garnish
- 8 oz bittersweet baking chocolate (I used Ghirardelli – 2 bars)
- 8-12 fresh cherries (optional, for garnish)
Variations
This Black Forest Cake recipe is flexible and can be adapted to suit your taste preferences! Here are some fun ideas to switch things up:
- Use different fruits: Swap out the cherries for raspberries or strawberries for a fresh twist!
- Add nuts: Mix in some chopped walnuts or almonds into the batter for added crunch.
- Go gluten-free: Substitute all-purpose flour with your favorite gluten-free blend.
- Experiment with frosting: Try using flavored whipped cream like coconut or peppermint for unique flavors.
How to Make Black Forest Cake
Step 1: Prepare the Pans
Preheat your oven to 350°F. Line two 8-inch round baking pans with parchment paper or spray them well with nonstick cooking spray. This ensures that your cakes release easily after baking—no one wants to leave part of their masterpiece stuck in the pan!
Step 2: Mix Dry Ingredients
In a large bowl, whisk together the flour, cocoa powder, baking powder, baking soda, and salt until combined. Setting these dry ingredients aside will help ensure they distribute evenly throughout your batter.
Step 3: Combine Wet Ingredients
In a liquid measuring cup, stir together buttermilk, instant coffee granules (if you’re using them), and vanilla extract. Take your time here—this step helps dissolve those coffee granules so that they infuse their rich flavor into the cake.
Step 4: Make the Batter
In another large bowl, mix together oil and sugar until they’re well combined. Add in each egg one at a time until the mixture lightens in color; this creates air pockets that make your cake fluffy! Alternate adding in your dry ingredients with the milk mixture—start and end with flour—to create a smooth batter.
Step 5: Bake the Cakes
Divide your chocolate batter evenly between the two prepared pans and smooth out the tops. Bake them in the lower two-thirds of your oven for about 28-35 minutes. Keep an eye on them starting around the 25-minute mark—the cakes are done when a toothpick comes out clean or with just a few moist crumbs attached.
Step 6: Cool Before Frosting
Let your cakes cool in their pans for about 15-20 minutes before gently flipping them onto cooling racks. Once they’re cool enough to handle but still warm, flip them out carefully! Allow them to cool completely before frosting—this step is key so that your whipped cream doesn’t melt off.
And there you have it! Follow these steps closely for an unforgettable Black Forest Cake that’s sure to impress everyone at your table!
Pro Tips for Making Black Forest Cake
Making a delicious Black Forest Cake can be a breeze with the right tips! Here are some expert suggestions to ensure your cake turns out perfectly every time.
-
Use Quality Cocoa Powder: The flavor of your chocolate cake greatly depends on the quality of cocoa you use. Opting for a high-quality Dutch-processed cocoa powder will give your cake a richer, deeper chocolate flavor that elevates the whole dessert.
-
Don’t Overmix the Batter: When combining your wet and dry ingredients, mix until just combined. Overmixing can lead to a dense cake instead of a light and airy texture. A few lumps are perfectly okay!
-
Check Your Oven Temperature: Every oven is different, so it’s wise to use an oven thermometer. Baking at the correct temperature ensures even cooking and prevents your cake from sinking in the middle.
-
Let the Cakes Cool Completely: Before frosting, make sure your cakes are completely cool. This prevents the frosting from melting and sliding off, allowing you to create a beautifully layered cake.
-
Chill Your Whipped Cream: Keep your heavy cream very cold before whipping. Chilled cream whips up better and holds its shape longer, ensuring that your frosting stays fluffy and does not sag over time.
How to Serve Black Forest Cake
Presenting your Black Forest Cake beautifully will make it even more enjoyable for your guests. Here are some creative serving ideas!
Garnishes
- Fresh Cherries: Adding fresh cherries on top not only enhances the visual appeal but also complements the cherry filling within the cake.
- Chocolate Shavings: Use a vegetable peeler or grater to create delicate chocolate shavings from bittersweet baking chocolate. They add elegance and extra chocolatey goodness.
- Mint Leaves: A few sprigs of fresh mint can brighten up your presentation and provide a refreshing contrast to the rich flavors of the cake.
Side Dishes
- Vanilla Ice Cream: A scoop of creamy vanilla ice cream pairs beautifully with the rich chocolate and tart cherries, creating a delightful contrast in textures.
- Coffee or Espresso: Serving a cup of hot coffee or espresso alongside your slice enhances the flavors of chocolate while providing a comforting warmth.
- Fresh Fruit Salad: A simple fruit salad made with seasonal fruits can lighten up the meal after indulging in such a rich dessert.
- Whipped Cream: For those who love extra creaminess, offering additional whipped cream on the side allows guests to customize their servings.
With these tips and serving suggestions, you’re ready to impress friends and family with an unforgettable Black Forest Cake that’s as beautiful as it is delicious! Happy baking!
Make Ahead and Storage
This Black Forest Cake is perfect for meal prep, allowing you to enjoy a delicious treat any time! With a few simple steps, you can prepare it in advance and store it for later enjoyment.
Storing Leftovers
- Allow the cake to cool completely before storing.
- Place any leftover cake in an airtight container at room temperature for up to 3 days.
- For longer freshness, keep the cake in the refrigerator for up to a week.
Freezing
- Slice the cake into individual pieces for easy thawing.
- Wrap each slice tightly in plastic wrap and then place them in a freezer-safe bag or container.
- The cake can be frozen for 1-2 months. When ready to enjoy, simply thaw overnight in the refrigerator.
Reheating
- To reheat individual slices, microwave on low power for about 10-15 seconds until warm.
- Alternatively, place slices in a preheated oven at 350°F (175°C) for 5-7 minutes.
FAQs
Here are some common questions about making this delightful Black Forest Cake!
Can I make Black Forest Cake ahead of time?
Absolutely! You can bake the chocolate layers in advance and store them properly until you’re ready to assemble the cake.
What makes Black Forest Cake special?
The combination of rich chocolate layers, tart cherry filling, and light whipped cream creates a decadent dessert that is both flavorful and visually stunning!
Can I substitute the cherries in Black Forest Cake?
Yes! If you can’t find tart cherries, feel free to use sweet cherries or another fruit that complements chocolate well, like raspberries.
How long does homemade Black Forest Cake last?
When stored properly at room temperature, it lasts about 3 days. Refrigerated, it can stay fresh for up to a week.
Is there a way to make this recipe gluten-free?
You can substitute all-purpose flour with a gluten-free blend designed for baking. Just ensure that all other ingredients are gluten-free as well!
Final Thoughts
This Black Forest Cake is truly a labor of love, combining rich flavors with delightful textures that will impress anyone who tastes it. I hope you enjoy making this recipe as much as I do—it’s perfect for celebrations or just because! Don’t hesitate to share your creations with friends and family; they’ll surely appreciate your baking skills. Happy baking!
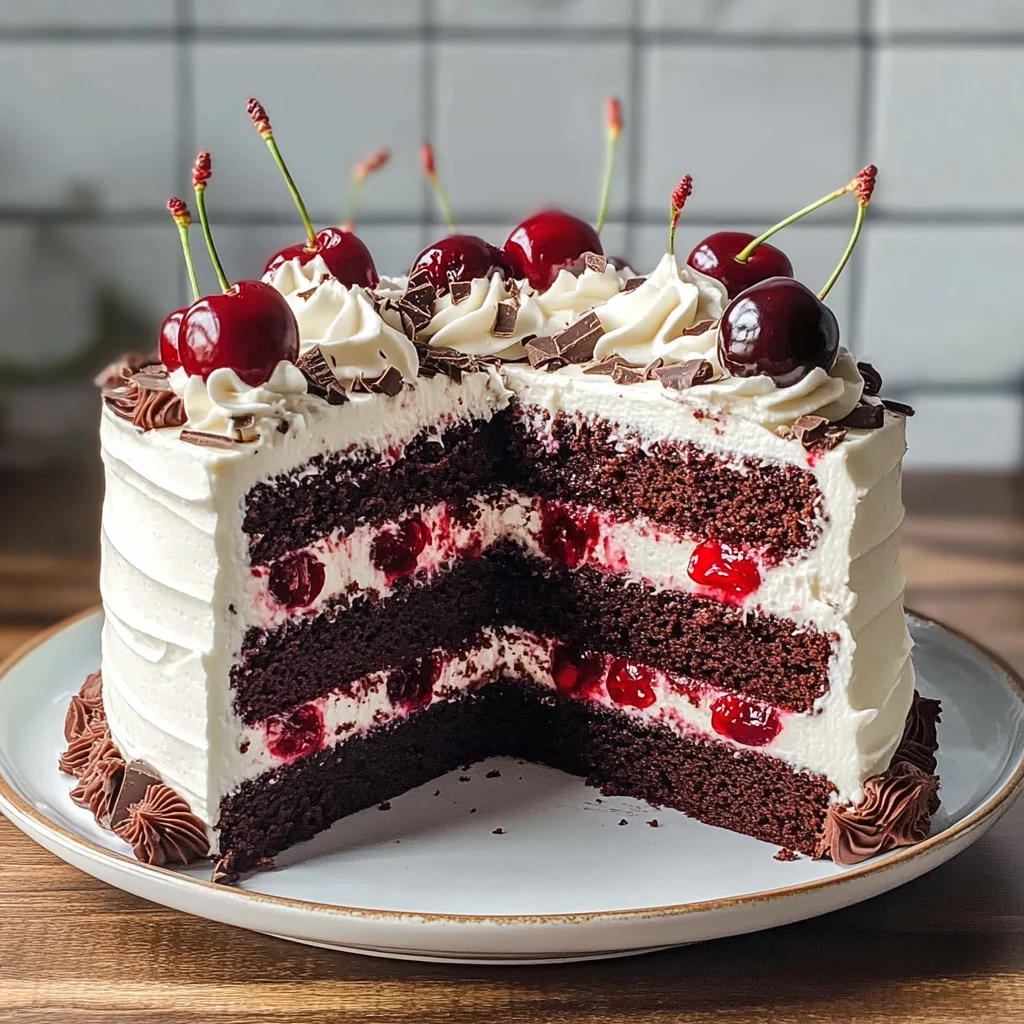
Black Forest Cake
Indulge in the ultimate dessert experience with this homemade Black Forest Cake, a delightful blend of rich chocolate layers and tart cherry filling. This cake is not only a feast for the eyes but also a celebration of flavor that brings friends and family together. With its fluffy chocolate base, luscious cherry filling, and creamy vanilla topping, each bite offers a perfect balance of sweetness and tartness. Ideal for birthdays, holidays, or any special occasion, this cake will surely impress your guests and satisfy your sweet cravings. Plus, it’s easy to make from scratch—allowing for personal touches that make every slice unique. Treat yourself or someone special to this decadent delight!
- Prep Time: 30 minutes
- Cook Time: 35 minutes
- Total Time: 1 hour 5 minutes
- Yield: Serves approximately 12 slices 1x
- Category: Dessert
- Method: Baking
- Cuisine: German
Ingredients
- 1 3/4 cups all-purpose flour
- 3/4 cup Dutch-processed cocoa powder
- 1 1/2 teaspoons baking powder
- 1 teaspoon baking soda
- 1/2 teaspoon salt
- 1 1/2 cups buttermilk
- 1 teaspoon vanilla extract
- 3/4 cup vegetable oil (canola oil)
- 2 cups granulated sugar
- 2 large eggs
- 1 large egg white
- 1/2 cup granulated sugar (for filling)
- 2 1/2 tablespoons cornstarch
- 2 cups tart cherries (frozen or canned, drained)
- 1 tablespoon butter
- 1/4 teaspoon almond extract
- 6 tablespoons chocolate syrup (divided)
- 1 1/2 cups heavy whipping cream
- 1/4 cup powdered sugar
- 2 teaspoons vanilla extract
- 8 oz bittersweet baking chocolate
- 8–12 fresh cherries (optional, for garnish)
Instructions
- Preheat your oven to 350°F and prepare two 8-inch round baking pans by lining them with parchment paper.
- In a large bowl, whisk together the flour, cocoa powder, baking powder, baking soda, and salt until combined.
- In a liquid measuring cup, stir together buttermilk, vanilla extract, and optional instant coffee granules.
- In another large bowl, mix together oil and sugar until well combined. Add in each egg one at a time until the mixture lightens in color.
- Gradually mix in the dry ingredients alternately with the buttermilk mixture to form a smooth batter.
- Divide the batter between prepared pans and bake for about 28-35 minutes or until a toothpick comes out clean.
- Let the cakes cool in their pans for about 15-20 minutes before transferring to cooling racks to cool completely.
Nutrition
- Serving Size: 1 slice (85g)
- Calories: 340
- Sugar: 28g
- Sodium: 250mg
- Fat: 16g
- Saturated Fat: 7g
- Unsaturated Fat: 9g
- Trans Fat: 0g
- Carbohydrates: 46g
- Fiber: 2g
- Protein: 4g
- Cholesterol: 60mg