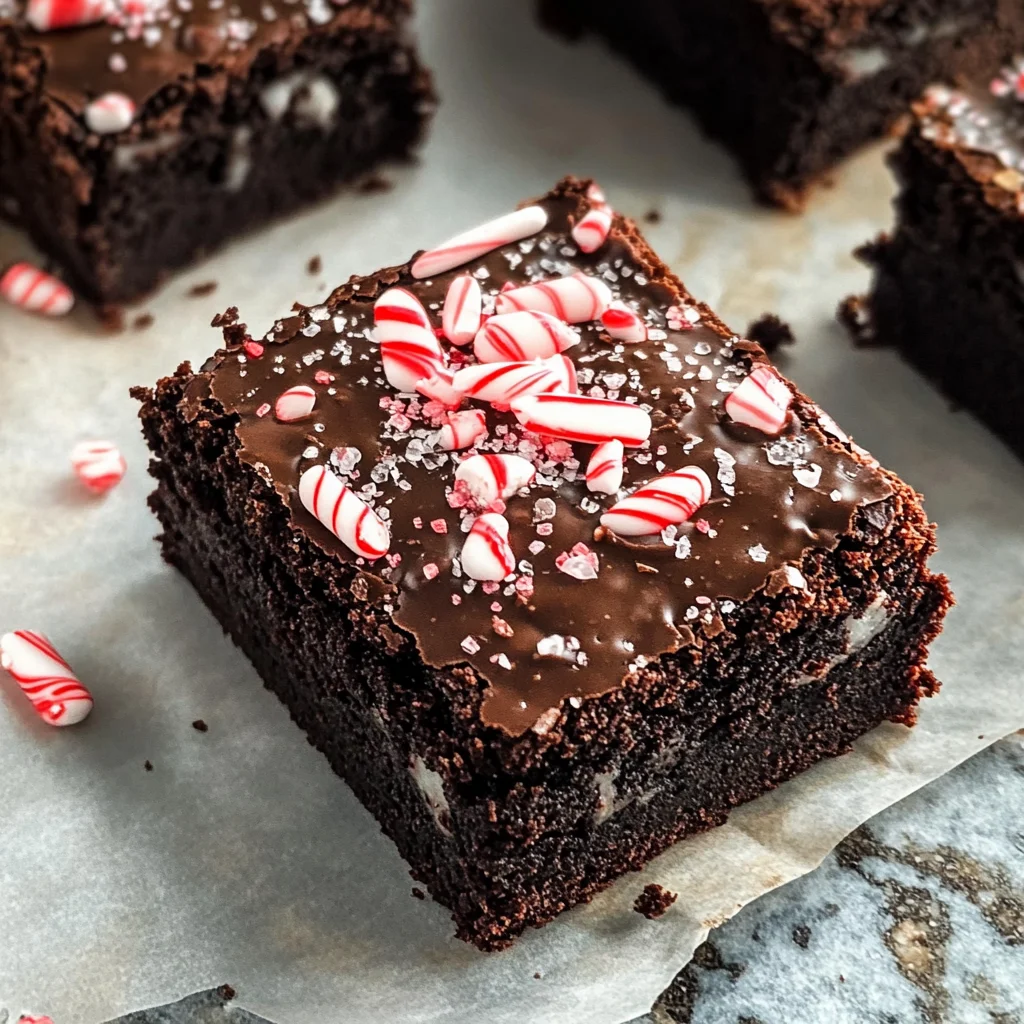
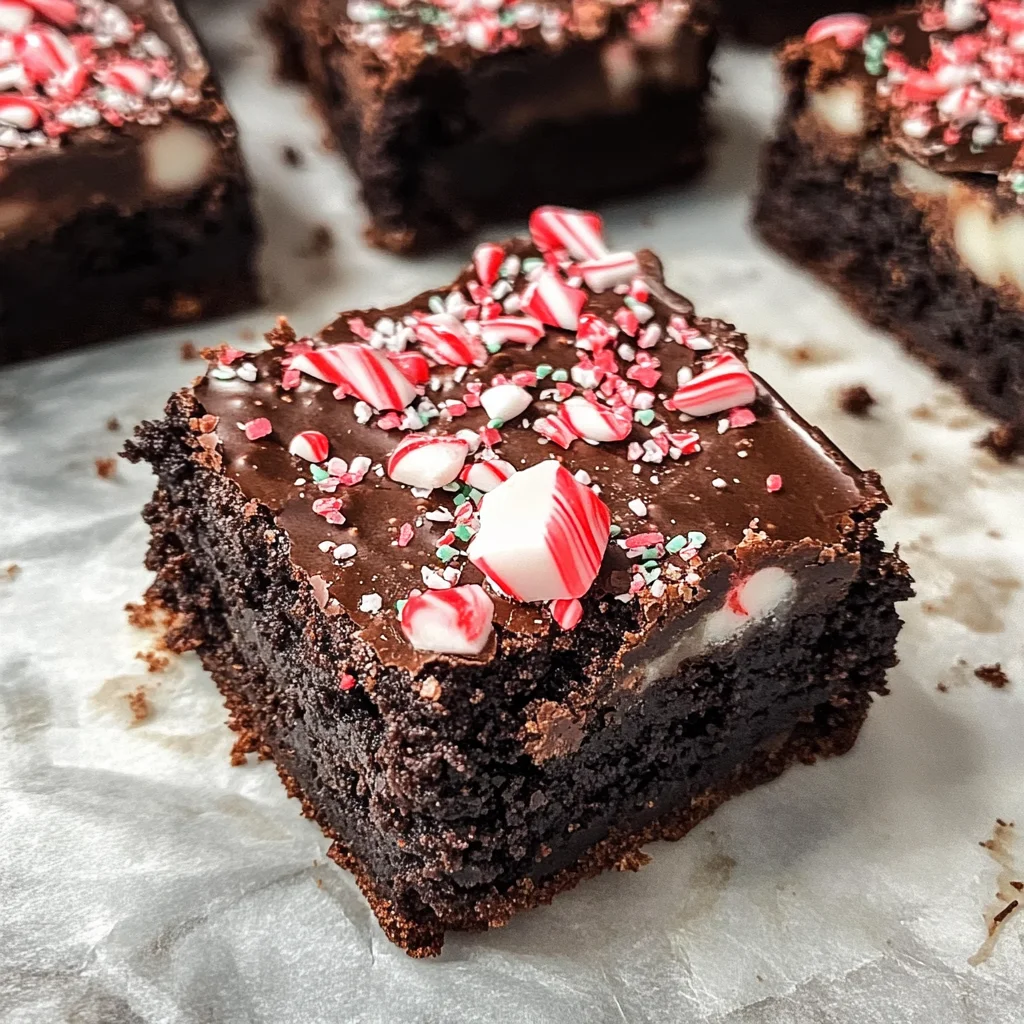
Dark Chocolate Peppermint Brownies
If you’re looking for a dessert that captures the spirit of the season while still being indulgent, you’ve found it! These Dark Chocolate Peppermint Brownies are a personal favorite of mine, and I can’t wait to share them with you. They embody everything we love about brownies—dense, fudgy, and rich with chocolate flavor—but they also bring a refreshing twist with peppermint. Perfect for busy weeknights when you need a little pick-me-up or for family gatherings where everyone can enjoy a sweet treat.
What makes these brownies even more special is how simple they are to make. You’ll find that the ingredients are wholesome and straightforward, making this recipe approachable for bakers of all levels. So grab your apron, and let’s dive into creating something delicious!
Why You’ll Love This Recipe
- Quick and Easy: With just 15 minutes of prep, you can whip these up in no time.
- Family-Friendly: The combination of chocolate and peppermint is sure to please everyone from kids to adults.
- Healthy Twist: Made with gluten-free and paleo-friendly ingredients, these brownies fit into many dietary preferences.
- Perfect for Any Occasion: Whether it’s a holiday gathering or a cozy night in, these brownies will steal the show.
- Make-Ahead Delight: Bake them ahead of time and chill in the fridge for an even richer flavor!
Ingredients You’ll Need
Let’s gather our simple, wholesome ingredients! You’ll be pleasantly surprised at how easy it is to put this delightful treat together. Here’s what you need:
For the Brownie Base
- 6 Tablespoons butter or coconut oil
- 1/2 cup chocolate chips
- 1 large egg plus 1 large yolk
- 1/2 teaspoon vanilla
- 1/2 cup no-sugar-added applesauce
- 3/4 cup blanched almond flour
- 1/2 cup cocoa powder (Special Dark is recommended, natural is fine too)
- 3 Tablespoons granulated monk fruit sweetener or granulated stevia
- 1/4 teaspoon salt
For the Peppermint Layer
- 1/2 cup coconut cream
- 1 large egg
- 2 Tablespoons granulated monk fruit sweetener or granulated stevia
- 1/4 teaspoon peppermint extract
- Festive sprinkles, if desired
Variations
This recipe is wonderfully flexible! Feel free to get creative and make it your own with these fun variations:
- Add Nuts: Toss in some chopped walnuts or pecans for a delightful crunch.
- Change the Flavor: Swap out peppermint extract for almond or orange extract for a different twist.
- Top It Off: Drizzle melted dark chocolate over the top after baking for an extra layer of indulgence.
- Go Dairy-Free: Use dairy-free chocolate chips to keep it completely plant-based.
How to Make Dark Chocolate Peppermint Brownies
Step 1: Preheat Your Oven
Start by preheating your oven to 350°F (175°C). This step is crucial because it ensures even baking right from the start. While your oven warms up, coat an 8 square pan with nonstick spray so that your brownies come out easily once baked.
Step 2: Melt the Chocolate Mixture
In a large microwave-safe mixing bowl, melt the chocolate chips and butter (or coconut oil) together. Microwave on high for about 60 seconds until nearly melted, then stir until completely smooth. This melting process brings out that rich chocolate flavor which will be the star of our brownies!
Step 3: Mix in Wet Ingredients
Next, stir in one whole egg and one yolk along with vanilla extract and applesauce. This mixture adds moisture and richness to your brownies. Mixing well ensures all ingredients blend seamlessly.
Step 4: Combine Dry Ingredients
In a separate bowl, whisk together almond flour, cocoa powder, sweetener, and salt. Then pour this dry mixture into your wet ingredients. Stir until just combined; overmixing can lead to dense brownies instead of fudgy ones!
Step 5: Prepare the Pan
Pour the brownie batter into your prepared pan and smooth it into an even layer using a spatula. Set this aside while we prepare our peppermint layer—it’s going to add such a wonderful contrast!
Step 6: Prepare the Peppermint Layer
In another bowl, whisk together coconut cream and another egg until well combined. Add in sweetener and peppermint extract, then mix until smooth. This creamy layer will add that festive peppermint kick we all love.
Step 7: Assemble Your Brownies
Pour the peppermint mixture over the brownie base in your pan and spread it evenly. If you’re feeling festive, sprinkle some sprinkles on top! They add not only color but also fun.
Step 8: Bake Away!
Bake your creation in the preheated oven for about 45-50 minutes or until a tester inserted comes out mostly clean. Keep an eye on them towards the end—you want them fudgy but not wet!
Step 9: Chill Before Serving
Once baked, allow them to cool slightly before chilling in the refrigerator—this step is essential for achieving that perfect texture! After they’re chilled (yes, it’s tough waiting!), slice them up and enjoy!
I hope you love making these Dark Chocolate Peppermint Brownies as much as I do! They’re sure to become a beloved recipe in your kitchen too.
Pro Tips for Making Dark Chocolate Peppermint Brownies
Making these brownies is a breeze, and with just a few pro tips, you’ll be set for success!
-
Use high-quality chocolate chips: This will enhance the rich chocolate flavor of your brownies. The better the chocolate, the more decadent your final product will be!
-
Don’t skip chilling time: It might be tempting to slice into them right away, but chilling allows the flavors to meld and makes cutting easier. This step ensures your brownies are perfectly fudgy and not too crumbly.
-
Experiment with sweeteners: If you prefer a sweeter brownie, feel free to adjust the amount of monk fruit sweetener or stevia to match your taste preferences. Just remember to keep an eye on the texture as you do!
-
Add a pinch of espresso powder: A small amount (1/2 teaspoon) can deepen the chocolate flavor without making them taste like coffee. It’s an excellent trick for elevating any chocolate dessert!
-
Store properly: Keep leftover brownies in an airtight container in the fridge for up to a week. They’ll stay fresh and delicious, ready for those late-night cravings or surprise guests!
How to Serve Dark Chocolate Peppermint Brownies
These Dark Chocolate Peppermint Brownies are not only delicious but also versatile when it comes to serving! Here are some fun ideas to make your presentation stand out.
Garnishes
- Whipped coconut cream: A dollop on top adds a light and creamy element that complements the dense brownies beautifully.
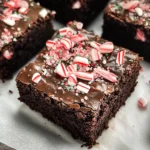
- Crushed peppermint candies: Sprinkling these over the brownies brings an extra festive touch and enhances the peppermint flavor.
- Dark chocolate shavings: Use a vegetable peeler to shave some dark chocolate on top. This creates an elegant look that elevates your dessert.
Side Dishes
- Fresh berries: A side of raspberries or strawberries not only adds color but also provides a tart contrast that balances the richness of the brownies.
- Mint tea: Serve these brownies with a warm cup of mint tea for a delightful pairing. The soothing mint flavor complements the peppermint in the brownies perfectly.
- Vanilla almond milk: Pouring some chilled vanilla almond milk will create a refreshing contrast while enhancing the overall experience with its creamy texture.
- Scoop of dairy-free ice cream: A scoop of your favorite dairy-free ice cream beside these brownies can turn this indulgence into a truly special dessert.
Now you’re all set to enjoy these decadent Dark Chocolate Peppermint Brownies! Happy baking!
Make Ahead and Storage
These Dark Chocolate Peppermint Brownies are perfect for meal prep! You can whip them up ahead of time, making them an ideal treat to have on hand for gatherings or just to satisfy your chocolate cravings throughout the week.
Storing Leftovers
- Allow the brownies to cool completely before storing.
- Place them in an airtight container at room temperature for up to 3 days.
- For longer storage, refrigerate the brownies in an airtight container for up to a week.
Freezing
- Cut the brownies into individual squares before freezing for easy portions.
- Wrap each brownie tightly in plastic wrap, then place them in a freezer-safe bag or container.
- They can be frozen for up to 3 months. Just make sure to label the container!
Reheating
- To enjoy the brownies warm, remove them from the refrigerator or freezer.
- If refrigerated, microwave each brownie for about 10-15 seconds until warmed through.
- If frozen, let them thaw in the refrigerator overnight, then reheat as mentioned above.
FAQs
If you have questions about these delicious brownies, you’re not alone! Here are some common inquiries.
Can I use a different sweetener in Dark Chocolate Peppermint Brownies?
Absolutely! Feel free to substitute with your favorite sugar alternative that measures like sugar. Just remember that sweetness levels may vary, so adjust according to your taste preference.
What makes these Dark Chocolate Peppermint Brownies gluten-free?
These brownies are made with blanched almond flour instead of traditional wheat flour. This not only makes them gluten-free but also adds a lovely nutty flavor!
How long do Dark Chocolate Peppermint Brownies last?
When stored properly at room temperature, they can last up to 3 days. For longer freshness, keep them in the refrigerator for about a week.
Can I make these Dark Chocolate Peppermint Brownies dairy-free?
Yes! Simply replace butter with coconut oil or another dairy-free alternative. This will still give you that rich texture without any dairy content.
Final Thoughts
I truly hope you enjoy making and indulging in these Dark Chocolate Peppermint Brownies as much as I do! They’re not just a treat; they embody warmth and festivity in every bite. So gather your ingredients and get ready for some delightful baking—your friends and family will be so impressed. Happy baking!
Dark Chocolate Peppermint Brownies
Indulge in the magic of the season with these Dark Chocolate Peppermint Brownies. Rich, fudgy, and infused with a refreshing peppermint twist, these brownies are perfect for any occasion—from cozy nights in to festive gatherings. With simple, wholesome ingredients, this recipe is approachable for bakers of all levels. Plus, they’re gluten-free and paleo-friendly, allowing everyone to enjoy a delightful treat without compromise. Whether you choose to add nuts or drizzles of chocolate on top, these brownies are sure to impress family and friends alike. Get ready to whip up a batch that will become a staple in your dessert repertoire!
- Prep Time: 15 minutes
- Cook Time: 50 minutes
- Total Time: 1 hour 5 minutes
- Yield: Approximately 12 servings 1x
- Category: Dessert
- Method: Baking
- Cuisine: American
Ingredients
- 6 tablespoons butter or coconut oil
- 1/2 cup chocolate chips
- 1 large egg plus 1 yolk
- 1/2 teaspoon vanilla extract
- 1/2 cup no-sugar-added applesauce
- 3/4 cup blanched almond flour
- 1/2 cup cocoa powder
- 3 tablespoons granulated monk fruit sweetener or stevia
- 1/4 teaspoon salt
- 1/2 cup coconut cream
- 1 large egg
- 2 tablespoons granulated monk fruit sweetener or stevia
- 1/4 teaspoon peppermint extract
Instructions
- Preheat your oven to 350°F (175°C) and grease an 8-inch square pan.
- Melt chocolate chips and butter (or coconut oil) in a microwave-safe bowl until smooth.
- Stir in the egg, yolk, vanilla extract, and applesauce until well combined.
- In another bowl, mix almond flour, cocoa powder, sweetener, and salt; then combine with the wet mixture.
- Pour batter into the prepared pan and set aside.
- Whisk together coconut cream, egg, sweetener, and peppermint extract for the peppermint layer.
- Spread this mixture over the brownie base.
- Bake for 45-50 minutes until a tester comes out mostly clean.
- Allow cooling before refrigerating for optimal texture.
Nutrition
- Serving Size: 1 brownie (60g)
- Calories: 180
- Sugar: 5g
- Sodium: 95mg
- Fat: 10g
- Saturated Fat: 6g
- Unsaturated Fat: 4g
- Trans Fat: 0g
- Carbohydrates: 16g
- Fiber: 3g
- Protein: 4g
- Cholesterol: 25mg