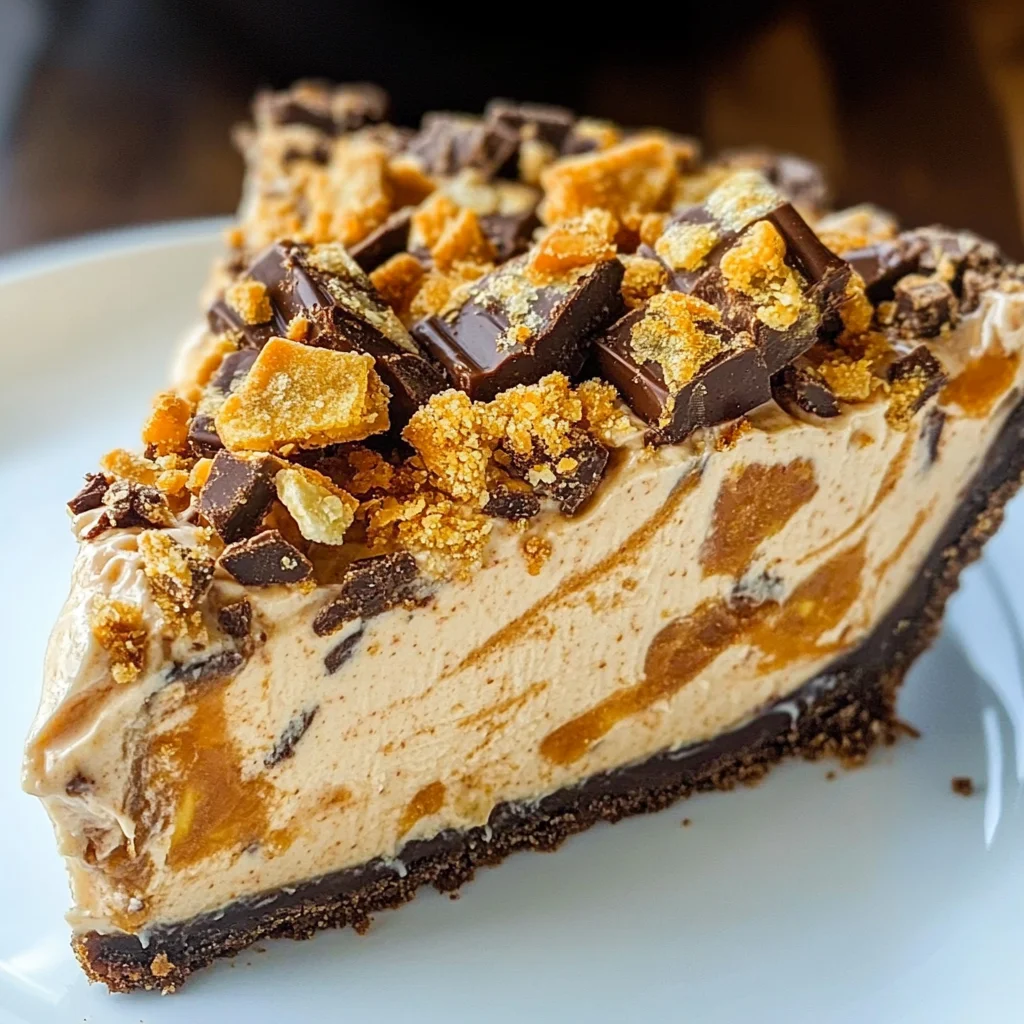
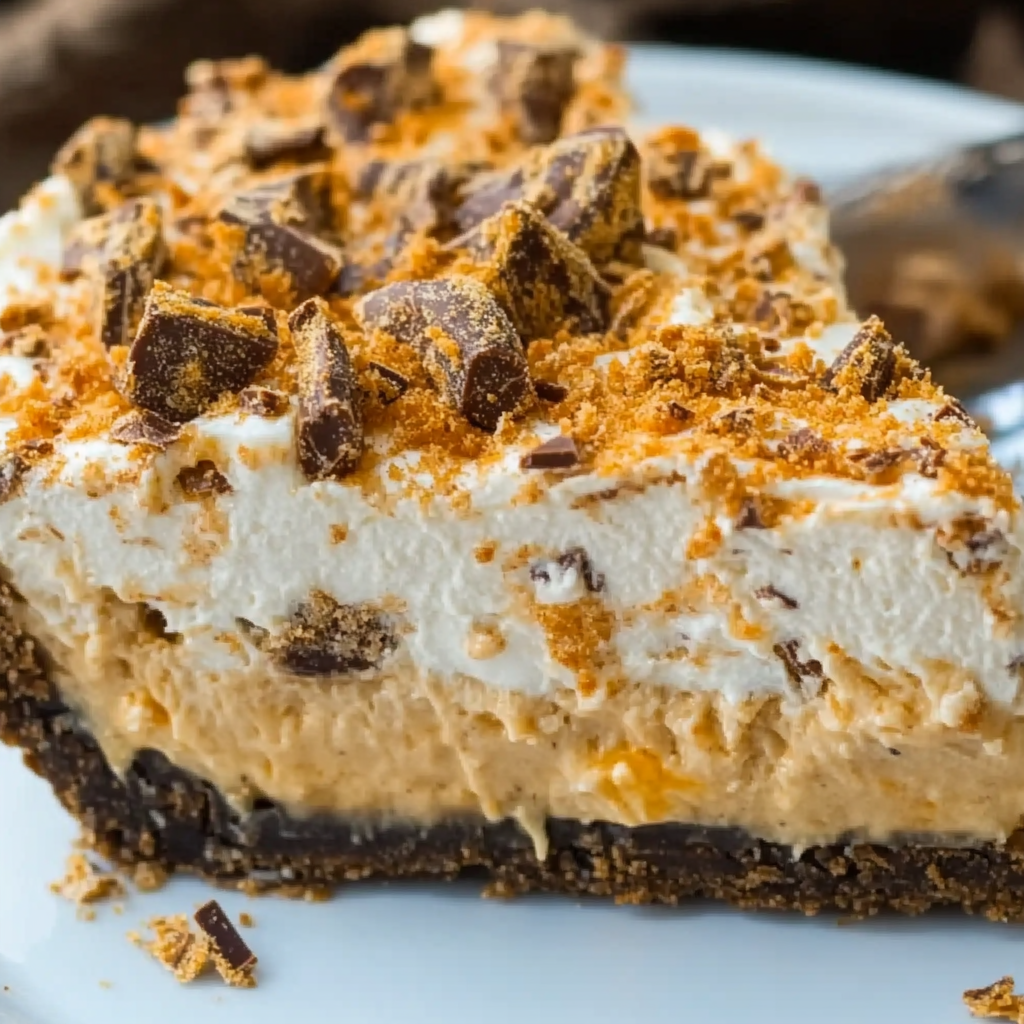
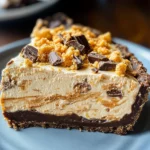
Butterfinger Pie
If you’re looking for a delightful dessert that will impress your friends and family, then this Butterfinger Pie is just the ticket! This cool and creamy pie combines the rich flavors of cream cheese and peanut butter with the irresistible crunch of Butterfinger bars. It’s a no-bake treat that’s perfect for any occasion, whether it’s a busy weeknight or a festive family gathering. Plus, it’s so simple to whip up that you’ll wonder why you haven’t made it sooner!
The best part? This Butterfinger Pie is sure to become a cherished recipe in your collection. With its blend of sweet and salty flavors, it’s like a party in your mouth!
Why You’ll Love This Recipe
- Super Easy to Make: With just a few simple steps, you can have this pie ready to chill in no time.
- Family Favorite: Kids and adults alike will adore the creamy texture and crunchy toppings.
- Make Ahead Convenience: Prepare it in advance and let it set, making your life easier on busy days.
- Deliciously Indulgent: Each slice is packed with flavor, satisfying even the sweetest tooth!
- No-Bake Delight: No oven required! Just mix and chill for a refreshing dessert.
Ingredients You’ll Need
Gathering these simple, wholesome ingredients will make this Butterfinger Pie even more enjoyable to prepare. You might even have some of them right in your pantry!
For the Filling
- 1 (8-ounce) package cream cheese (room temperature)
- 1/2 cup creamy peanut butter
- 2 teaspoons vanilla extract
- 1 1/2 cups powdered sugar
- 1 (12.5-ounce) bag fun-sized butterfinger bars (crushed; reserve 2 bars to sprinkle on top)
- 1 (8-ounce) container Cool Whip (thawed)
For the Crust
- 1 store-bought oreo or chocolate graham cracker crust
Variations
One of the best things about this Butterfinger Pie is how flexible it is! Feel free to get creative with these variation ideas:
- Add a Chocolate Drizzle: Melt some chocolate chips and drizzle over the top for an extra indulgent touch.
- Mix Up the Toppings: Swap out Butterfingers for other favorite candy bars like Snickers or Reese’s for new flavors.
- Try Different Nut Butters: If you’re not a fan of peanut butter, almond or cashew butter works beautifully too.
- Make It Gluten-Free: Use a gluten-free chocolate crust to accommodate dietary needs without sacrificing flavor.
How to Make Butterfinger Pie
Step 1: Prepare the Creamy Base
Start by placing the cream cheese and peanut butter into a large mixing bowl. It’s essential that your cream cheese is at room temperature; this ensures everything combines smoothly. Add in the vanilla extract and beat with an electric mixer until everything is velvety.
Step 2: Sweeten It Up
Next, gradually add in the powdered sugar while continuing to mix. This step not only sweetens your filling but also creates that luscious texture we all love in desserts. Keep mixing until it’s nice and smooth – you want every bite to be perfect!
Step 3: Fold in the Crunch
Now comes the fun part! Gently fold in those crushed Butterfinger bars. This adds that signature crunch and flavor that’s so delightful – don’t rush this step; folding keeps things airy.
Step 4: Incorporate Some Whipped Goodness
Take your thawed Cool Whip and fold it into your mixture. This will lighten up your filling beautifully, making every slice feel like biting into fluffy clouds of goodness.
Step 5: Assemble Your Pie
Spread your creamy filling into the prepared crust evenly. Sprinkle those reserved Butterfinger pieces on top for a pretty finish that also gives an extra crunch when you dig in!
Step 6: Chill Before Serving
Finally, pop your pie into the refrigerator for at least four hours before serving. This allows all those delicious flavors to meld together beautifully – patience really does pay off here!
And there you have it—a wonderfully easy Butterfinger Pie that’s sure to become a favorite at any gathering! Enjoy every delicious bite!
Pro Tips for Making Butterfinger Pie
Creating the perfect Butterfinger Pie is simple and rewarding—let’s make sure you get it just right!
- Use room temperature cream cheese: This ensures a smooth mixture without lumps, making your filling creamy and delightful.
- Don’t skip the chilling time: Refrigerating the pie for at least 4 hours allows the flavors to meld beautifully and helps the pie set properly.
- Reserve extra Butterfinger pieces: Sprinkling crushed bars on top adds a lovely crunch and visual appeal, making every slice a treat.
- Experiment with crusts: While an Oreo or chocolate graham cracker crust works wonderfully, feel free to try a nut-based crust for added texture and flavor.
- Make it ahead of time: This pie stores well, so you can prepare it a day in advance—perfect for gatherings or busy weeknights!
How to Serve Butterfinger Pie
When it comes to serving this delectable dessert, presentation can enhance the experience. Here are some fun ideas to make your Butterfinger Pie shine!
Garnishes
- Chocolate drizzle: A light drizzle of melted chocolate over the top not only looks stunning but also adds an extra layer of flavor.
- Whipped cream: Dollop some whipped cream on individual slices for a light and fluffy contrast to the rich filling.
Side Dishes
- Fresh fruit salad: A refreshing medley of seasonal fruits provides a bright contrast that balances out the richness of the pie.
- Vanilla ice cream: A scoop of vanilla ice cream complements the chocolate and peanut butter flavors beautifully, offering a comforting touch.
- Chocolate-covered pretzels: The salty crunch of pretzels pairs perfectly with the sweetness of the pie, creating a delightful sweet-and-salty experience.
- Coffee or herbal tea: A warm beverage can be a great accompaniment, enhancing your dessert experience while providing a cozy finish to your meal.
With these serving suggestions and tips, your Butterfinger Pie will not only taste fantastic but also impress everyone at your table! Enjoy this delicious dessert that brings joy with every bite!
Make Ahead and Storage
This Butterfinger Pie is not only a delightful treat but also an excellent option for meal prep. You can easily make it ahead of time, allowing the flavors to meld beautifully while saving you time on busy days.
Storing Leftovers
- Store any uneaten pie in the refrigerator.
- Cover it with plastic wrap or store it in an airtight container to maintain freshness.
- Enjoy leftovers within 3-4 days for the best taste and texture.
Freezing
- While this pie is best enjoyed fresh, you can freeze it if needed.
- Wrap individual slices or the whole pie tightly in plastic wrap, followed by aluminum foil.
- Freeze for up to 2 months. Thaw in the refrigerator before serving.
Reheating
- This Butterfinger Pie is served chilled, so there’s no need to reheat it.
- Just let it sit at room temperature for about 10-15 minutes before slicing if it’s been frozen; this helps soften it slightly for easier cutting.
FAQs
Got questions? No worries! Here are some common queries about Butterfinger Pie.
Can I make Butterfinger Pie ahead of time?
Absolutely! This pie is perfect for making ahead of time. Just prepare it a day or two in advance and let it chill in the fridge until you’re ready to serve.
What can I use instead of Cool Whip in Butterfinger Pie?
If you’re looking for an alternative to Cool Whip, you can use homemade whipped cream or a non-dairy whipped topping. Both will add a lovely lightness to your Butterfinger Pie!
How long does Butterfinger Pie last in the fridge?
Your delicious Butterfinger Pie will stay fresh in the fridge for about 3-4 days when properly stored.
Can I add more toppings to my Butterfinger Pie?
Definitely! Feel free to get creative with toppings. You could add chopped nuts, chocolate drizzle, or even extra crushed Butterfinger bars for that added crunch.
Final Thoughts
I hope you enjoy making this cool and creamy Butterfinger Pie as much as I do! It’s such a simple yet indulgent dessert that’s sure to impress friends and family alike. Remember, whether it’s a special occasion or just a sweet treat after dinner, this recipe has you covered. Happy baking, and don’t forget to share your experience!
Butterfinger Pie
Indulge in the creamy delight of Butterfinger Pie—a no-bake dessert that’s sure to impress! This easy-to-make treat combines the luscious flavors of cream cheese and peanut butter with the delightful crunch of crushed Butterfinger bars. Perfect for any occasion, from casual weeknight dinners to festive gatherings, this pie is a crowd-pleaser that can be prepared in advance. With its sweet and salty balance, every bite feels like a celebration. Gather your ingredients, whip up this delightful dessert, and prepare for compliments!
- Prep Time: 15 minutes
- Cook Time: None
- Total Time: 0 hours
- Yield: Serves approximately 8 slices 1x
- Category: Dessert
- Method: No-Bake
- Cuisine: American
Ingredients
- 8 ounces cream cheese (room temperature)
- 1/2 cup creamy peanut butter
- 2 teaspoons vanilla extract
- 1 1/2 cups powdered sugar
- 12.5 ounces fun-sized Butterfinger bars (crushed; reserve 2 for topping)
- 8 ounces Cool Whip (thawed)
- 1 store-bought chocolate crust
Instructions
- In a large mixing bowl, blend the room-temperature cream cheese and peanut butter until smooth. Add vanilla extract and mix well.
- Gradually incorporate powdered sugar while continuing to mix until smooth and creamy.
- Gently fold in the crushed Butterfinger bars, ensuring an even distribution without deflating the mixture.
- Fold in the thawed Cool Whip until fully combined for a light texture.
- Spread the filling evenly into the prepared chocolate crust and sprinkle reserved Butterfinger pieces on top.
- Refrigerate for at least four hours to set before serving.
Nutrition
- Serving Size: 1 serving
- Calories: 350
- Sugar: 28g
- Sodium: 220mg
- Fat: 24g
- Saturated Fat: 10g
- Unsaturated Fat: 12g
- Trans Fat: 0g
- Carbohydrates: 35g
- Fiber: 1g
- Protein: 5g
- Cholesterol: 30mg